This is where I describe my experience with each product. You'll find things like first impression of the product, overview of installation, links to my videos, and links to the Product Details page (with Brand and price info), and more. If you have motorcycle related products that you think would work on Project Diavel, please contact laz@lulays.com for details.
We live in a great time, where we can search out opinions and videos to help determine what we want to buy and how to install stuff once we get it. With diligent searching, we can often find professional installation videos that take us step by step through the correct way to install a product... my reviews and videos offer a different perspective. I'm a regular dude that looks around the web to find other people's videos and write ups on products, and then I attempt to apply what I learned to my situation. I decided a while back that it would be good to show visitors my "average dude" point of view of products, installations, and uses.
I've been riding and tweaking street bikes since 1982 (and atv's long before that). Consequently I didn't just get off the turnip truck, and I have a fair amount of general knowledge regarding street bikes. Brands I've owned: Honda, Yamaha, Kawasaki, Suzuki, Triumph, Harley, and Ducati (way too many to count over the years). My mechanical prowess is based on my limited abilities, knowledge, and tools. I am not a mechanic, I am a web developer and graphic artist... so keep that in mind when watching my installation videos. There are certainly alternative ways of doing things, and I will be demonstrating my experiences based on "how it went for me". For professional installation, please visit materials provided by each brand.
Day One
To give a baseline, I am inlcluding the boring video I shot the day after I got the bike. The only non-stock thing at this point is the mirrors that I pulled off my FZ1.
I probably should begin this section by describing my street bike performance philosophy. When my brother and I were young, we poured out countless money on various internal performance products (big bore, stroker kits, cams, fuel alternatives) on ATV's. I constantly observed "mind blowing" power, generally (and sometimes shortly thereafter) followed by "engine blowing" power. To have the fastest you frequently push to extremes, and there is a significant price for that. So, what is my performance philosophy?... Breathe baby. Somewhere along the line, I learned to accept (partly because of my continuing limited goodie funds) that if I left the internals alone and just got engines to breathe good - the performance gains were good enough, because the trade off was durability. So now I seek performance intake and exhaust products, supported by tuning to help maximize those efforts.
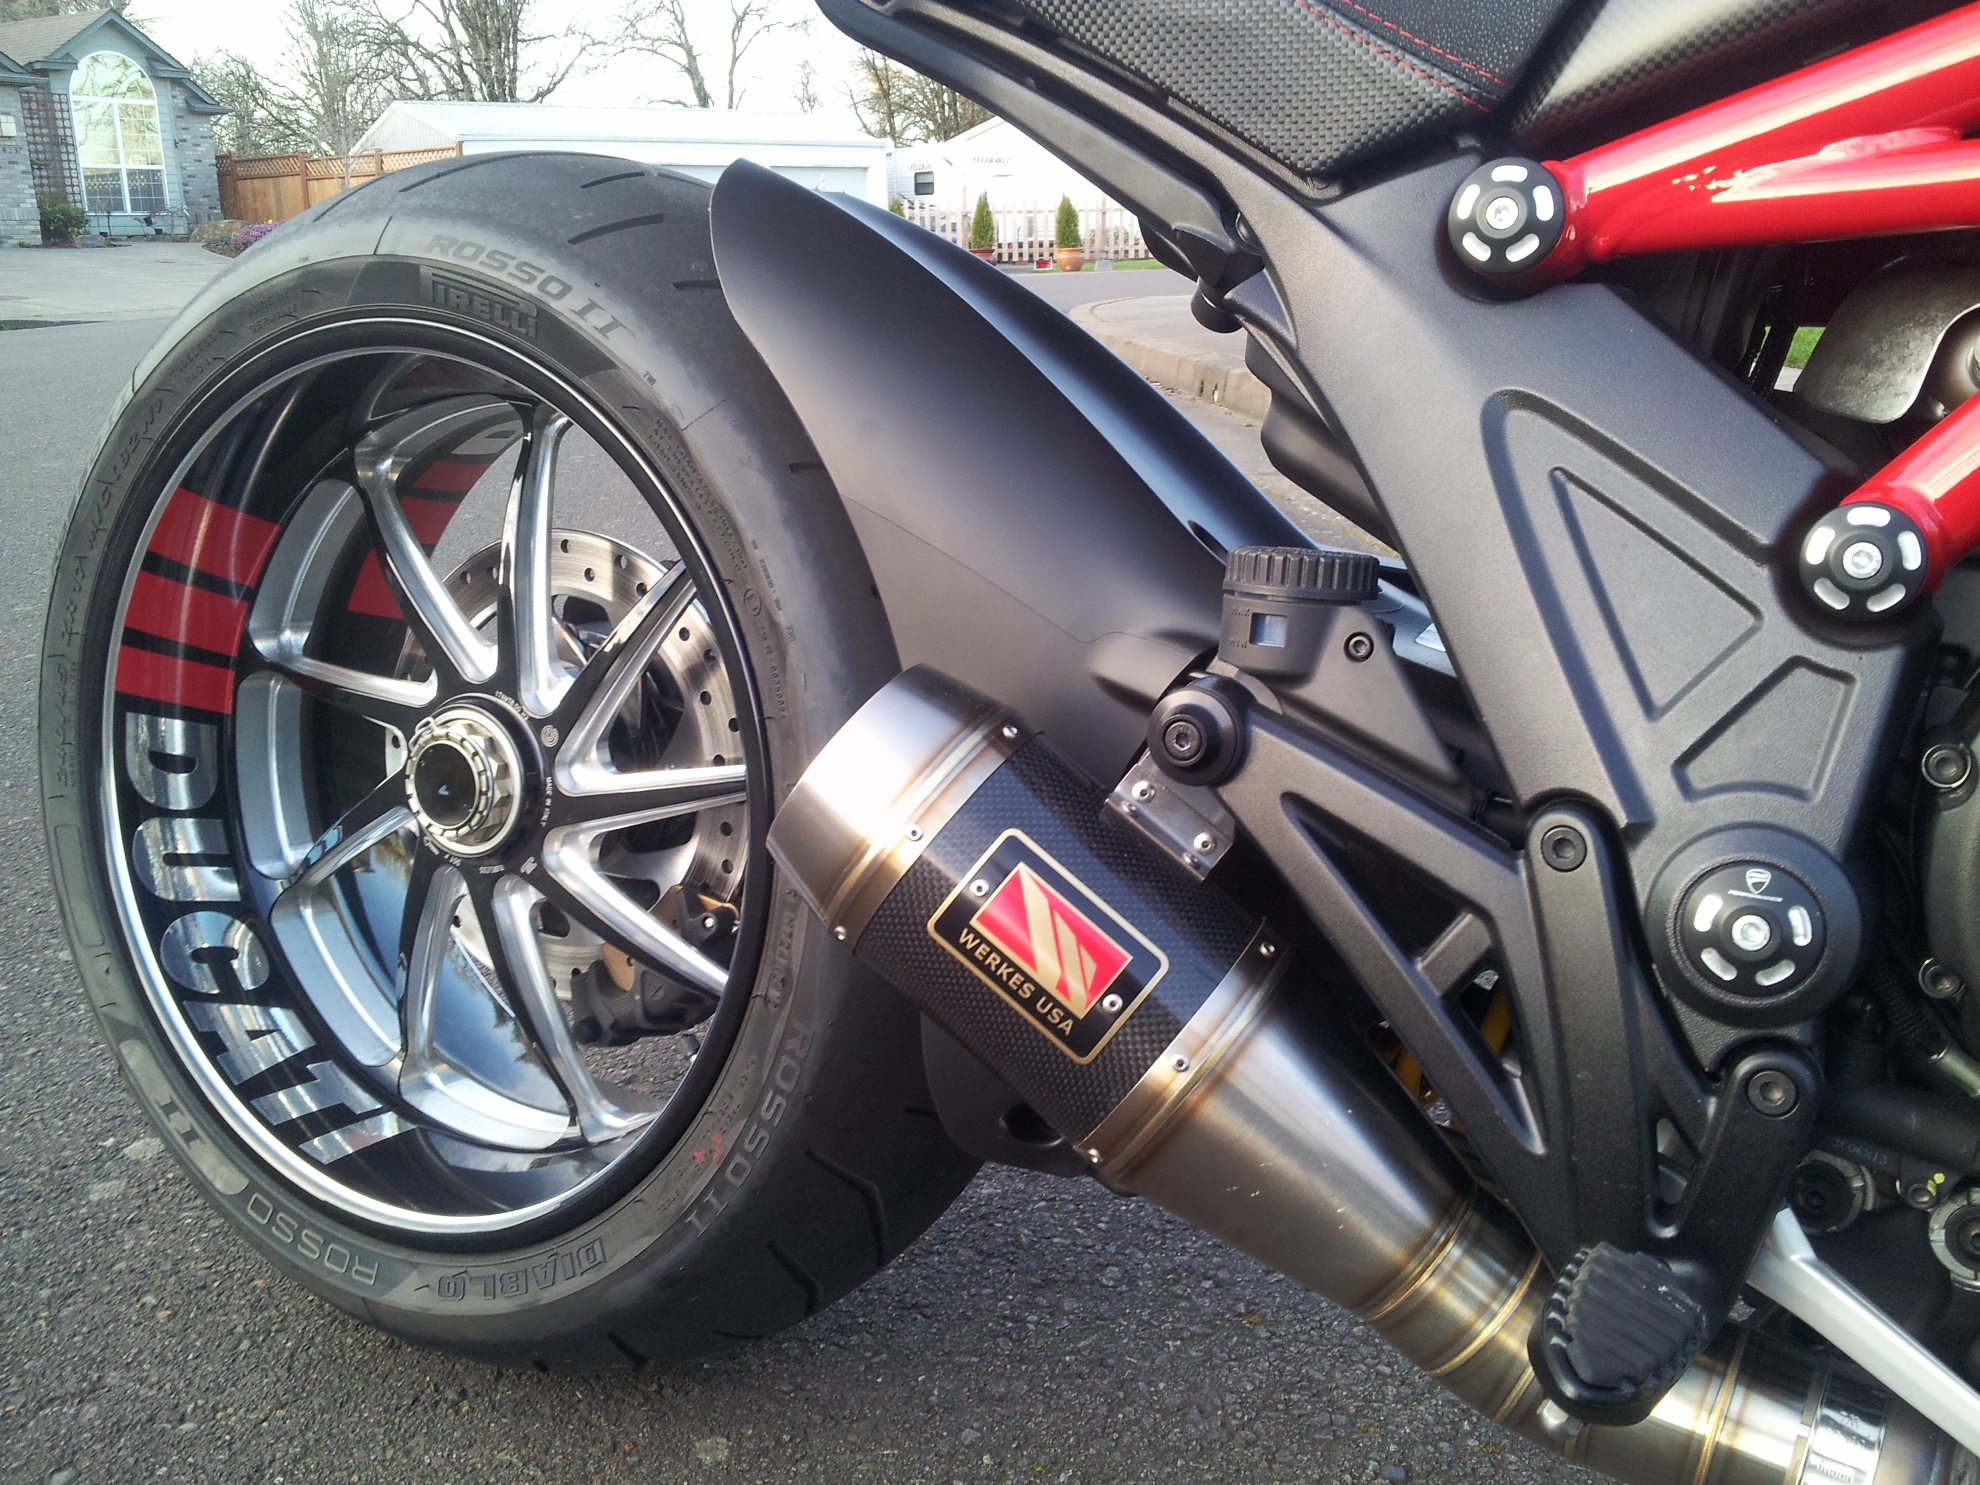
- I've never met a stock motorcycle or car that I didn't think would benefit from an exhaust modification. Normally, I've got two things in mind with an exhaust - how it looks and how it sounds. However in this case I have a third consideration - the Diavel has a single sided swing arm which exposes the beauty of the wheel... and why would anybody want to hide that beauty behind an exhaust? So began my quest for a can to meet my three considerations. I opened Google and typed "Diavel Exhaust", then clicked Images (I like to start with the visual to get ideas, then I click the "visit" links by the photo to find out things like the brand).
Everyone that has been around Ducatis is aware of the Termignoni exhaust... my opinion = I like that it is Italian and sticks to the Italian theme, I like the performance that can be gleaned from the full system, I like the way it looks, and I don't like the price. My number one consideration was to find an exhaust that would be short enough to maximize the view of that wheel = the two brands I noted were Werkes and GPR. I went on the Diavel forum and searched for comments and based on comments, the looks, the sound (from YouTube), and the price - I decided on the Competition Werkes with the Carbon Fiber option. I think it blends well with the header and lets the attention be on the rest of the bike. Watch for more on this exhaust in my other performance reviews and review/performance videos.
Exhaust Insert
Consider getting the optional insert in case your iddy biddy ears tan't hando the wowd noise... or if your police or state has a problem with sweet sounding Ducati. Also if you are doing track days it would be wise to bring it with you in case your bike blows over the noise limit.
Installation
It was two bolts and the installation takes about two minutes. It took me longer to find the tools and set up.
- I find buying an after market air filter is a "no brainer". The two biggest reasons to upgrade is the performance gain over a stock filter, and the fact that they are re-useable... which means if you replace the stock filter a few times, it pays for the cost of an aftermarket filter. BMC offers three versions for the Diavel - 1) a standard filter meant to replace the stock with a re-useable, 2) a race version that offers more flow, and 3) a carbon race filter that offers the high flow of the race filter, and adds a rigid carbon fiber frame. I chose the middle - race - version (I would have gone with their carbon version, but I have a lot more stuff I'm still trying to buy - so I compromised).
Installation
I found some great step by step directions on the Diavel Forum by Ace. The biggest challenge of this installation was when it came to the removal and installation of the three screws that mount the air induction intakes to the end of the filter. They are deep set and my 4mm allen long handle wasn't as long as I would have liked. I plan to go to a hardware store and buy a really long (at least 6 inches) allen to make the job easier next time. I dropped one of the screws and was blessed to locate it before it went somewhere that I could have never seen it - I had a hard enough time trying to locate it as it was). In addition, it wouldn't be a bad idea to order a couple of these to have as spares before you do this operation next time (just in case you drop and lose one or more).
Tools Needed
10mm wrench; allen wrenches - 2.5, 3.0, 4.0 and long handle 4.0; blue lock tite; long screw driver might be handy to help manipulate things if necessary.
- I looked all over for a stand that would get the bike up off of both wheels so I could do maintenance and cleaning. Since I had a Ducati I was really leaning towards getting the standard front and rear stands. In my search I found BURSIG which is a company based in Germany with distribution throughout the world. Their center-lift stand quickly slides into the side of the frame and with one pull of the handle, lifts the entire bike off of the ground (much faster than using the front and rear separate stands). Once up in the air you have un-interrupted access to the front and rear areas of the bike, which means you don't have to work around the bars found on the separate stands. For guys that change their own tires, chains, and brakes - this is a huge advantage. At this time, BURSIG is launching an all new price point which reduces the price and makes their stand too hard to pass up.
One of the things I hadn't thought of was being able to use this stand while washing my bike. I always wash my bike on the side walk and have never entertained bringing my stationary separate stands down there to wash. I have a hydraulic center lift stand for my Harley, but even though that stand has wheels - it is heavy and is a pain to roll far... but not the BURSIG stand. It rolls easy and is a "no brainer" to bring to the sidewalk and lift before washing. It is a dream to wash this bike up in the air. I can even wash sitting down now... and anybody that knows me well (ask my dad) knows I like to take the easy way out any time I can.
BURSIG makes adapters for tons of bikes (I got one for my FZ1 too). The link above will take you to their site for more details.
- For those of you that have been following my bike sites, you've seen a constant partner: Ride-On. Each of my bikes has had sweet wheels with wide tires... and when you spend the money for nice stuff, you want to maximize the look and do what you can to protect them. Here are a some of the things this product helps with. 1st) If I'm out in the middle of no where on a Sunday afternoon and pick up a nail or screw in the main part of my tire, Ride-On will enable me to get the bike home... without having to put a plug in my tire and air it back up. 2nd) Toss the wheel weights! Ride-On moves to the right areas inside the wheel to give your wheel that perfect balance, and you don't have to use wheel weights. 3rd) Water can build up in air compressors and when you put air in your tires, some of that water can get inside your wheel... Ride-On absorbs that condensation.
Mechanics will usually whine about the mess that tire sealants make, but Ride-On doesn't make the mess that other sealants make. Their video below shows what it looks like on the inside when you dismount a tire.
Installation
You will need an air valve stem removal tool (supplied in their installation kits). You simply remove the air valve, squeeze the proper amount of product in each tire (see their tire specification guide to determine how much), re-insert the air valve, and air to correct pressure.
If you are going to be on your bike long at all, comfort is an important topic. The following products help, and their side affects just happen to be that they are nice looking options as well.
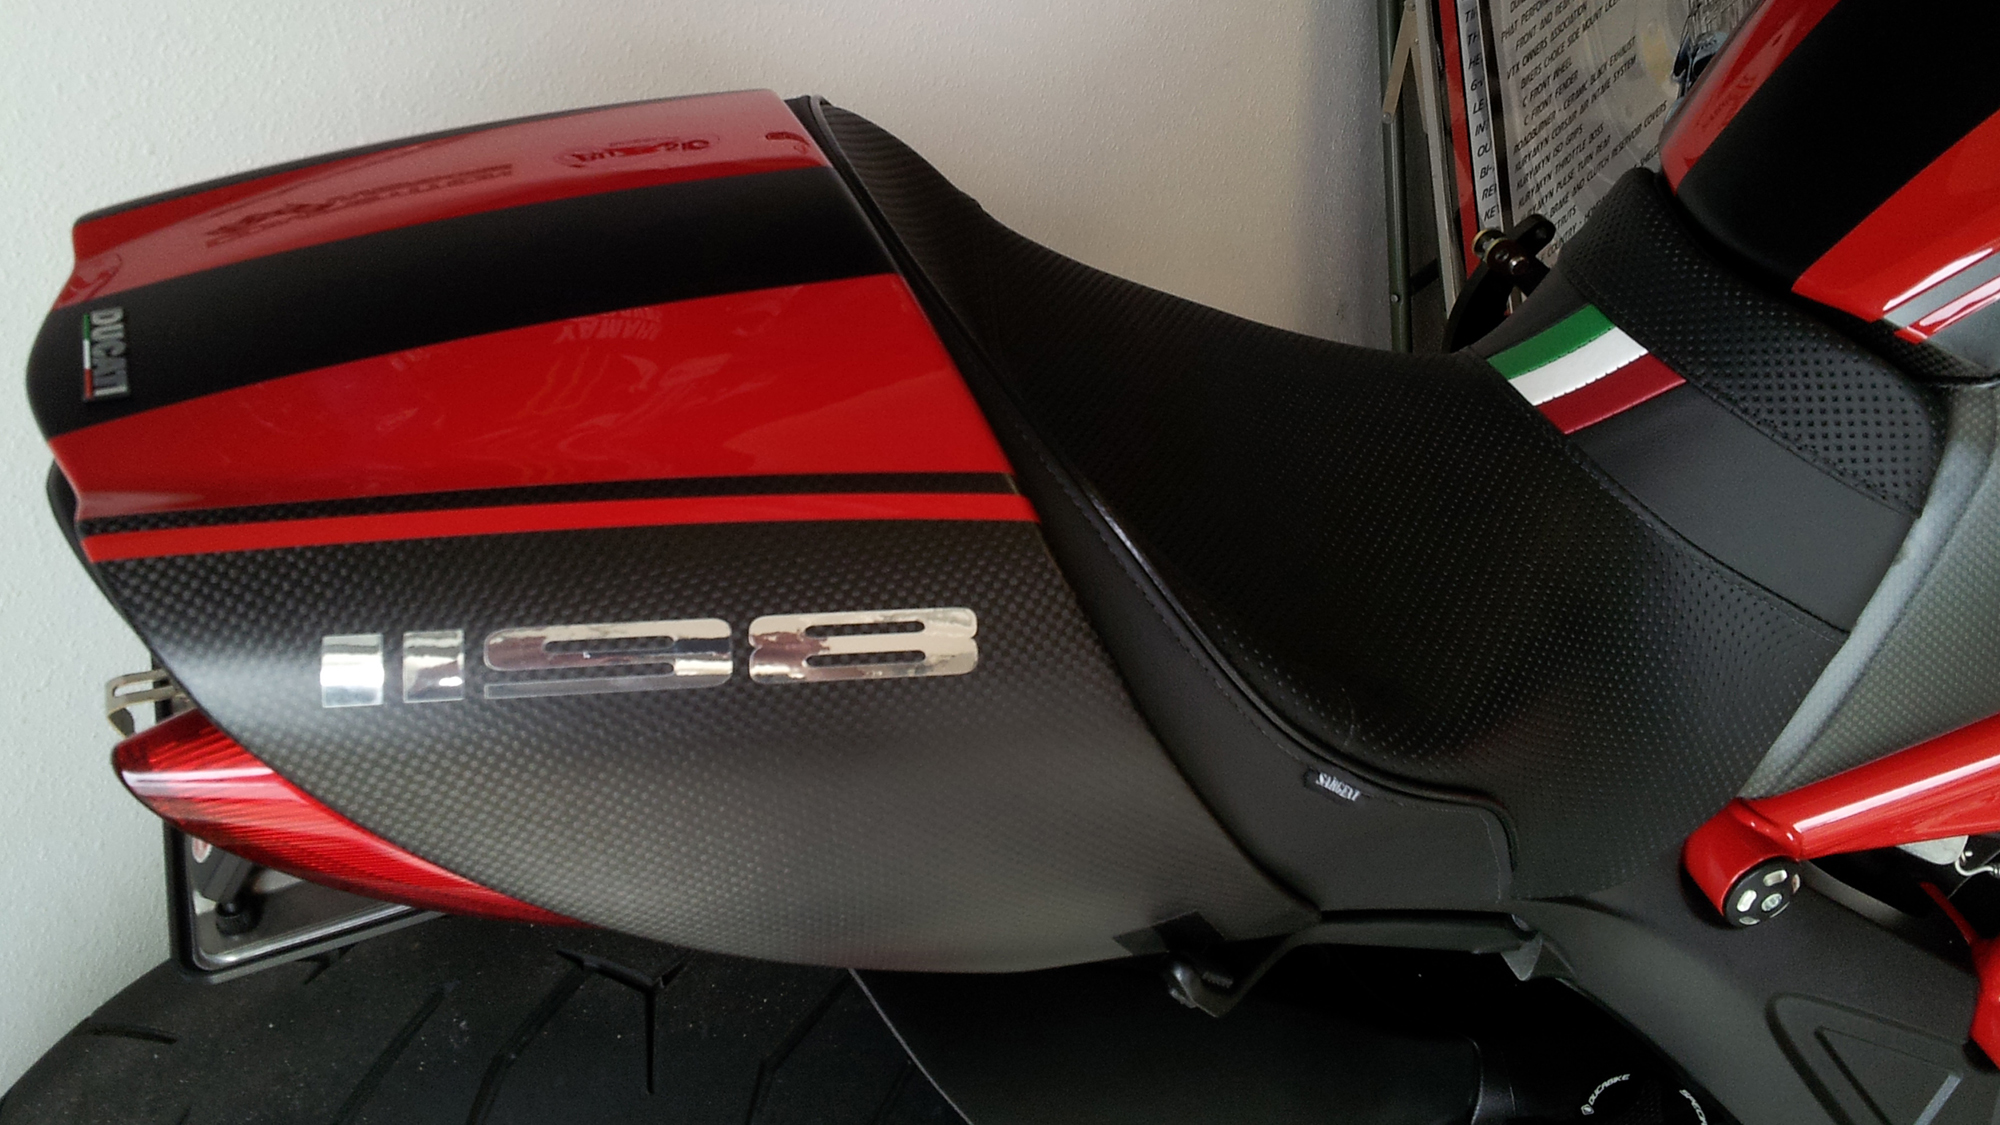
Sargent Seats just un-veiled their first seat offering for the Ducati Diavel in April of 2015. I cracked open the piggy bank and decided to option my seat up.
The Project Diavel Sargent Seat Order
World Sport Performance Seat - allows the OEM sport cowl to connect, maintains place for OEM tools, and they throw in a free Sargent LED flashlight;
Regular Height seat (they also offer a taller one) with a black welt;
Options: full leather (perforated leather front, smooth leather back), Italian tri color front strap, heated driver, heated passenger.
The Project Diavel bike makes history with Sargent, and has many firsts for them:
Project Diavel seat is the 1st ever seat from Sargent with the new moisture barrier. All of Sargent's premium perforated leather seats will now contain this new option;
Project Diavel seat is the 1st Diavel seat with perforated leather (as of 5/15/2015, the only one);
Project Diavel seat is the 1st all leather Diavel seat using a new pull method (something to do with how they attach it to the foam);
Project Diavel seat is the 1st Diavel seat with heat (as of 5/15/2015, the only one);
Project Diavel seat is the 1st Diavel seat with heated front and rear (as of 5/15/2015, the only one);
Project Diavel seat is the 1st Diavel seat with the Tri-Color option (as of 5/15/2015, the only one);
Click Here for the full Sargent Seat Review
This review with photos and videos was too large to put on this page, so I created a full page specifically for the Sargent Seat review.
- It seems like there are countless brands that offer aftermarket levers for bikes. Some are great and some are just cheap. Some of the choices I made enabled me to move some of the money I would have spent, on to other cool parts and the levers were one of those places that I simply wanted to get the very best I could find. I searched, and read, and looked, and read... then finally decided that the DUCABIKE Evo III's looked like the best combination of quality, adjustability, and looks for what I wanted. Like most of the other vendors, they offered them up in several color combinations (and frankly I thought they all looked pretty cool), but I want to match my contrast cut "natural" theme and went with black and silver. They don't scream "Look At Me"!... but if you do, they look nice and you can tell they are a high quality lever.
Installation
I looked all over the place and couldn't find anybody that had any instructions for installing these. I guess most folks just figure this is so easy that anybody can do it. So me, being just a regular dude got to scratching my head and thought - well it must be pretty simple then. I took lots of photos as I took the stock levers off and the installation basically requires two parts - removing the anchor bolt (just a allen and a 10mm wrench), and then placing this little pin with a sleeve. Well, the bolt and removal was no problemo... but that pin was another story. The pin had a slot close to one end, and a rubber nipple attached to the assembly was there to receive this pin. In theory, it seems straight forward - just put the pin in the nipple until the slot goes around the slot. The chore was trying to figure out how to get the nipple to hold outward while sticking the nipple in. The solution for me was to use needle nosed pliers to hold the nipple out and gently work the pin in... once I figured this out I got it on the first try. Tough part over = put the anchor bolt back on and install is done. Repeat for other side, and finished.
- I've had several of the brands of rearsets that are on the market, so had some ideas of which brand I might go with... but when I started looking closely I thought DUCABIKE had quality that was on par or better than any of the top brands I was familiar with. I also liked that they offered two options for the Diavel (full rearsets, and the set that I chose which is more like a "mini" version). The PPDV01's allow about a half inch height (which can get the pegs a little higher for track days), plus the pegs are about a quarter inch narrower than stock (which should help prevent scraping when riding agressive on the street). These are real "grippy" and offer a more aggressive look, and the contrast cut style matches all of my other billet and the wheels on the bike.
Installation
If you really have your act together, you could probably install these in about a half hour (which means that if I had my act together, maybe 45 minutes). Everything was very straight forward except when it came to putting the pin back in when mounting. The spring that wraps around the pin is a major pain in the butt to line up when re-installing. You have to push and load that spring up, while trying to line up the pin... it seems pretty easy, like a child putting the round peg in the round hole... but for me it just didn't want to line up. I had to squeeze the spring in some to help it line up when installing. I finally got it done in about 1.5 hours, but all of that extra time was spent just messing with that spring.
Tools needed
6mm allen, 5mm allen, 4mm, red threadlock, blue threadlock, pliers, flat head screw driver, hammer (optional)
- When I bought the Diavel one of the first things I searched for was factory cruise control, which I found quickly was not offered. The closest thing I found to factory cruise was buying a tuner that controlled the air/fuel mixture and connected to the bike's electronics. Even though I found one, the tuner I wanted to use (RapidBike) didn't offer cruise at this time, so I started looking at various throttle lock options. I found the Go Cruise and liked that it was an easy install and looked very simple to use.
Installation
Their new version (the Go Cruise 2) is adjustable and installs without having to remove or modify the grip. No tools are required, unless you have bar end mirrors (like I do). I had to remove the bar end mirror, before I could put the band over the grip.
You simply move the band to the end of the grip, then un-screw the Go Cruise 2 to open wide enough to go over the grip, and then you tighten it down to where it is not so tight that it can't move, yet tight enough to stay where you put it against the brake.
- When purchasing a helmet a combination of several priorities help make my decision.
Looks, weight, ventilation, protection, noise, lineage, and price.
Looks
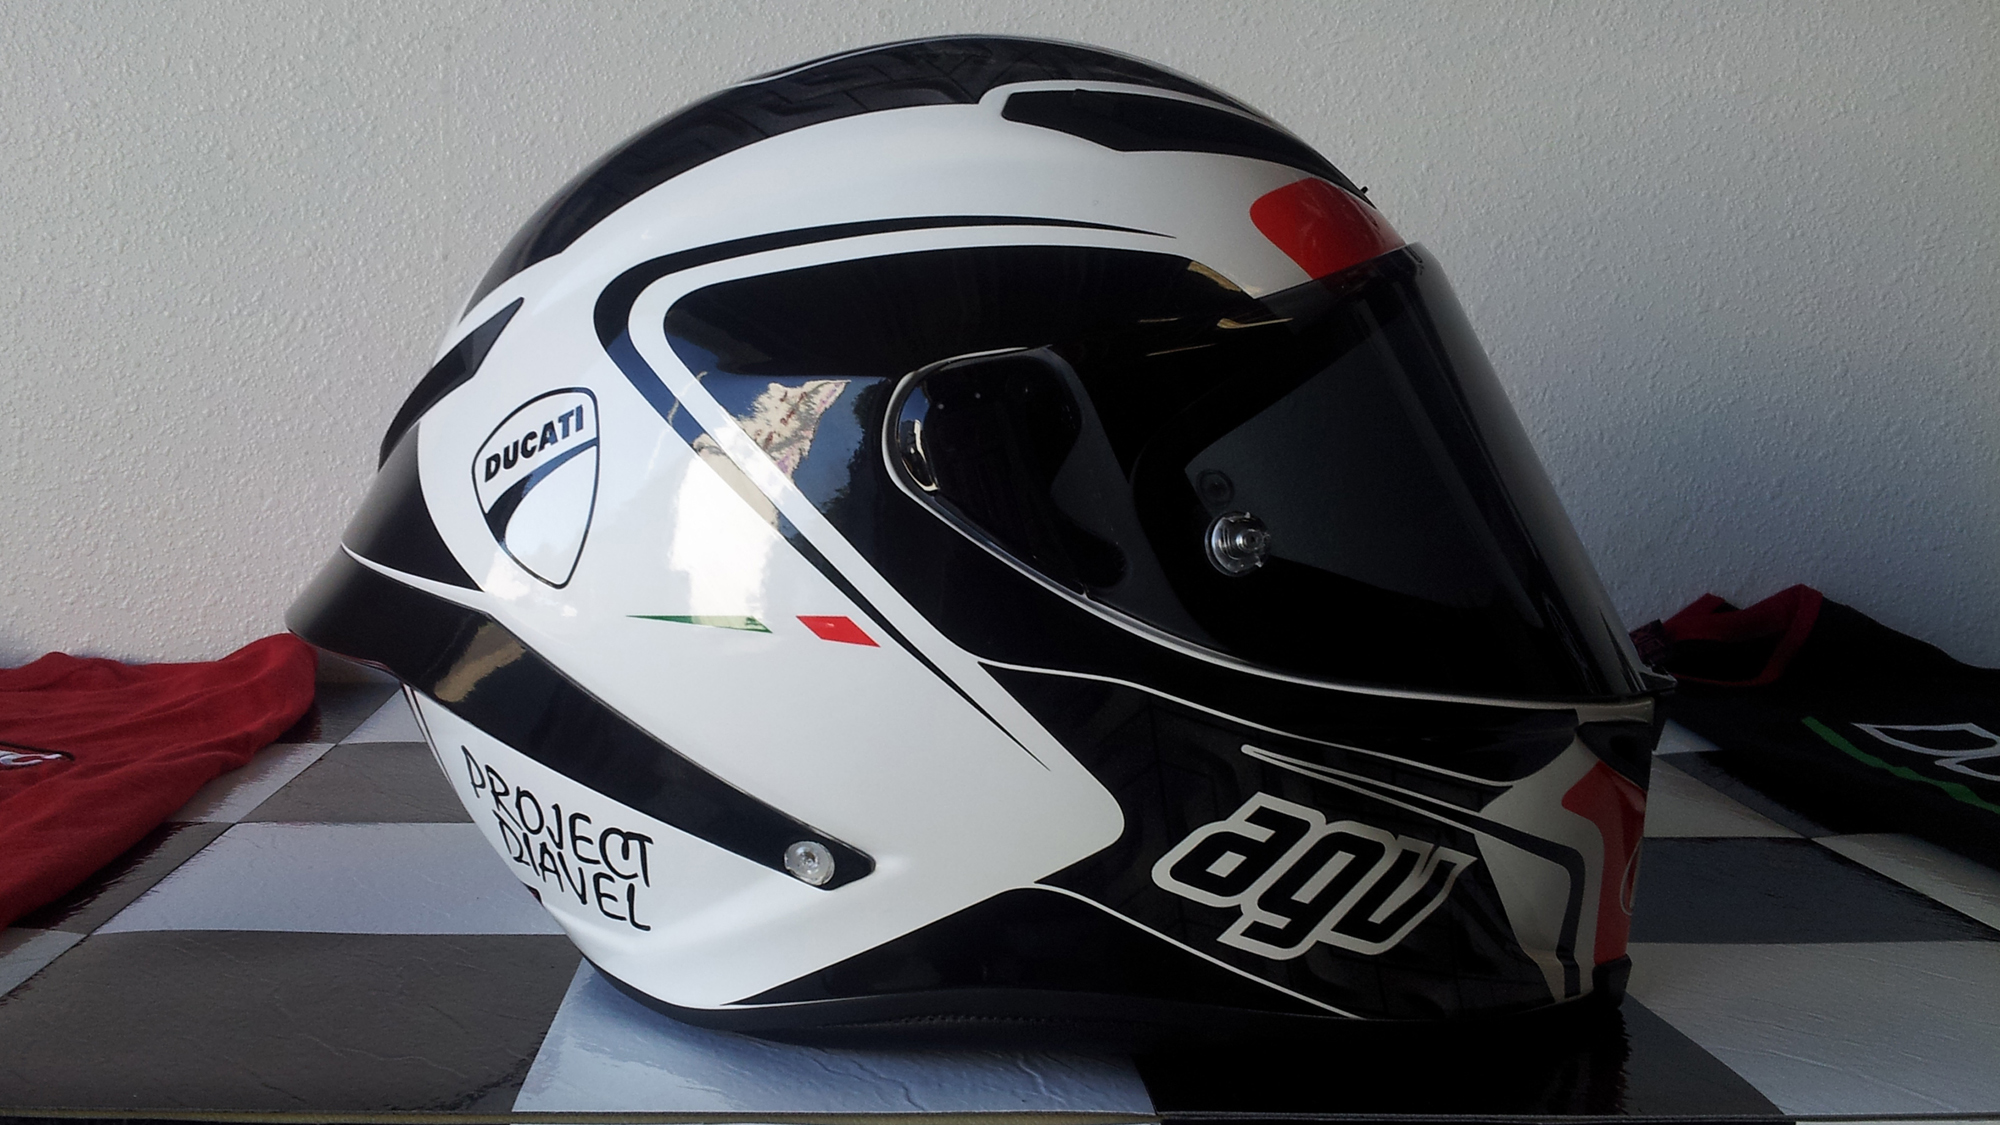
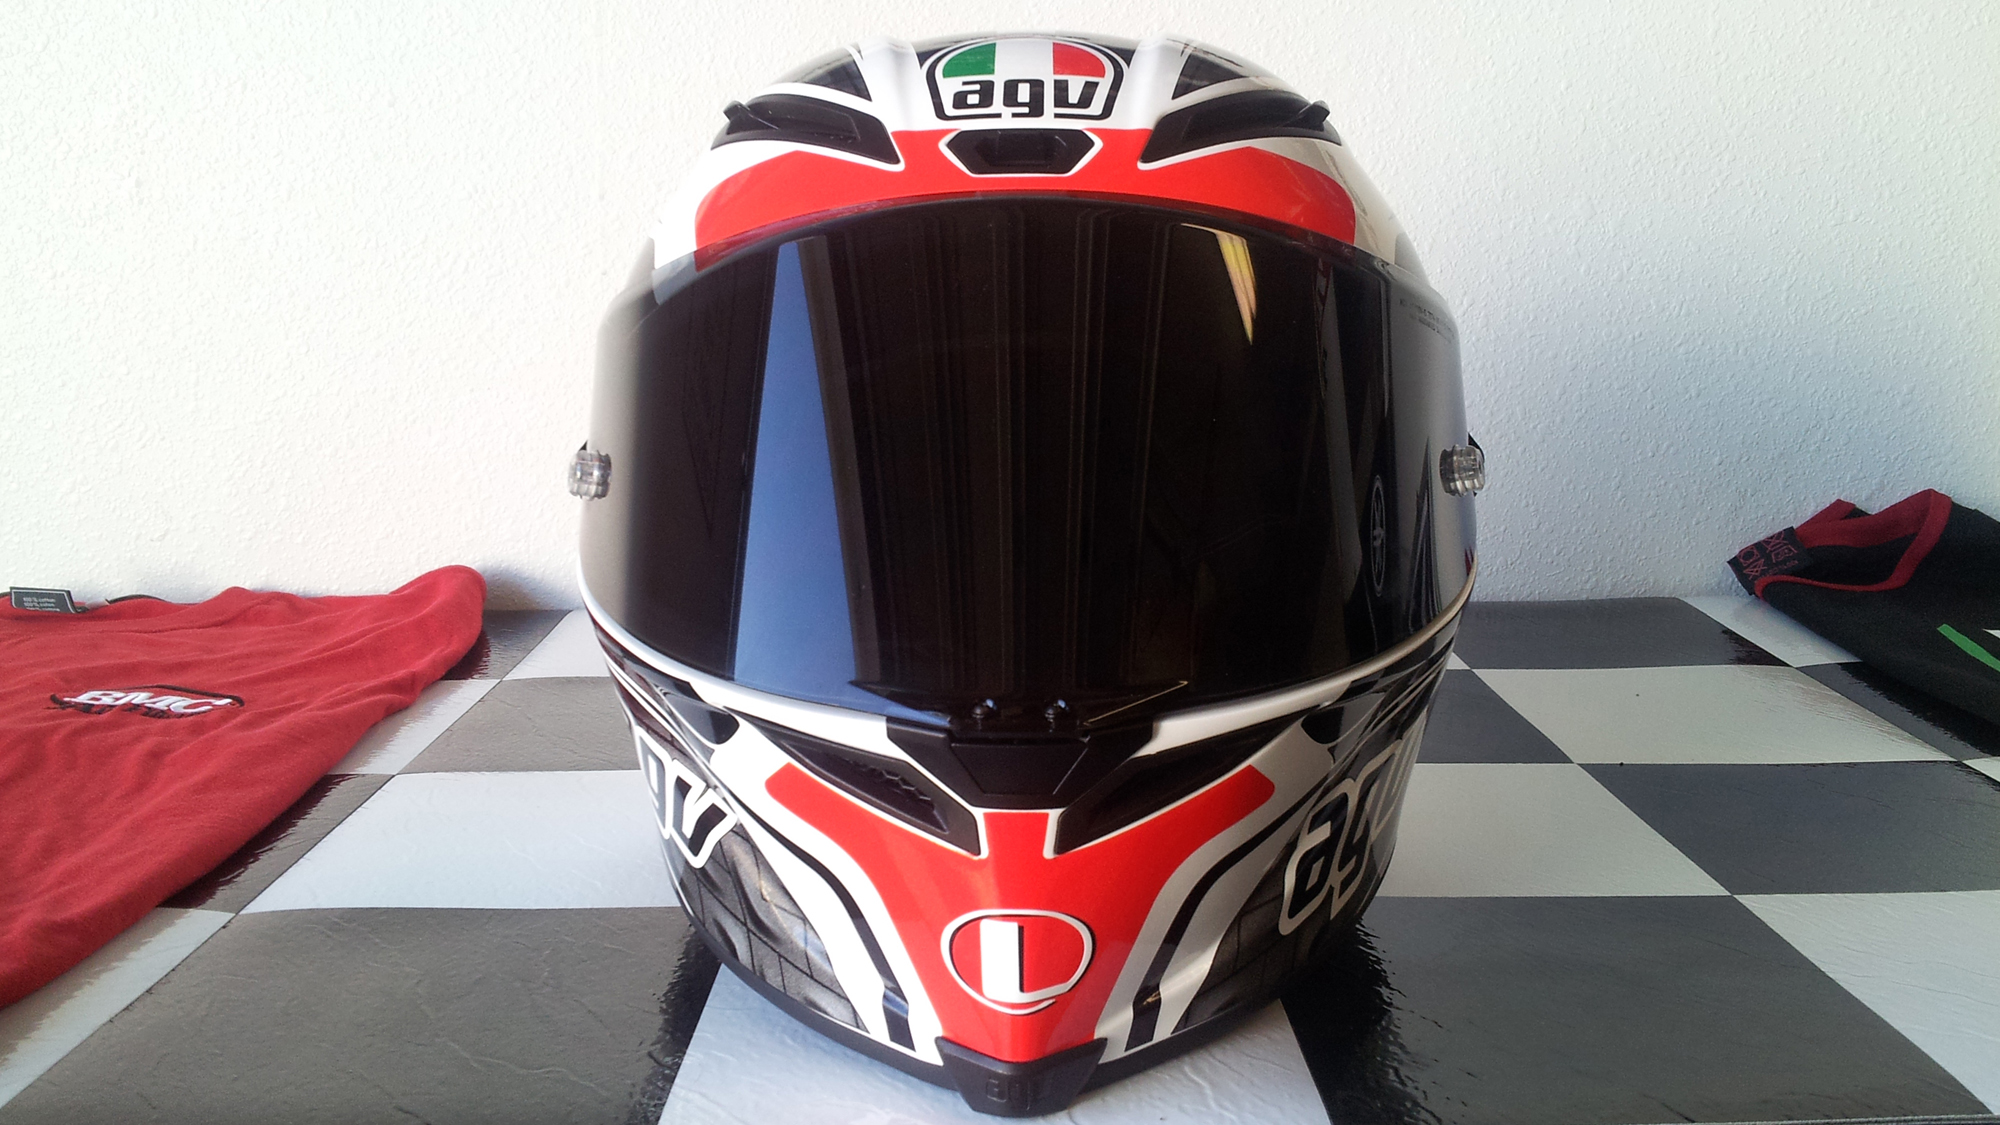
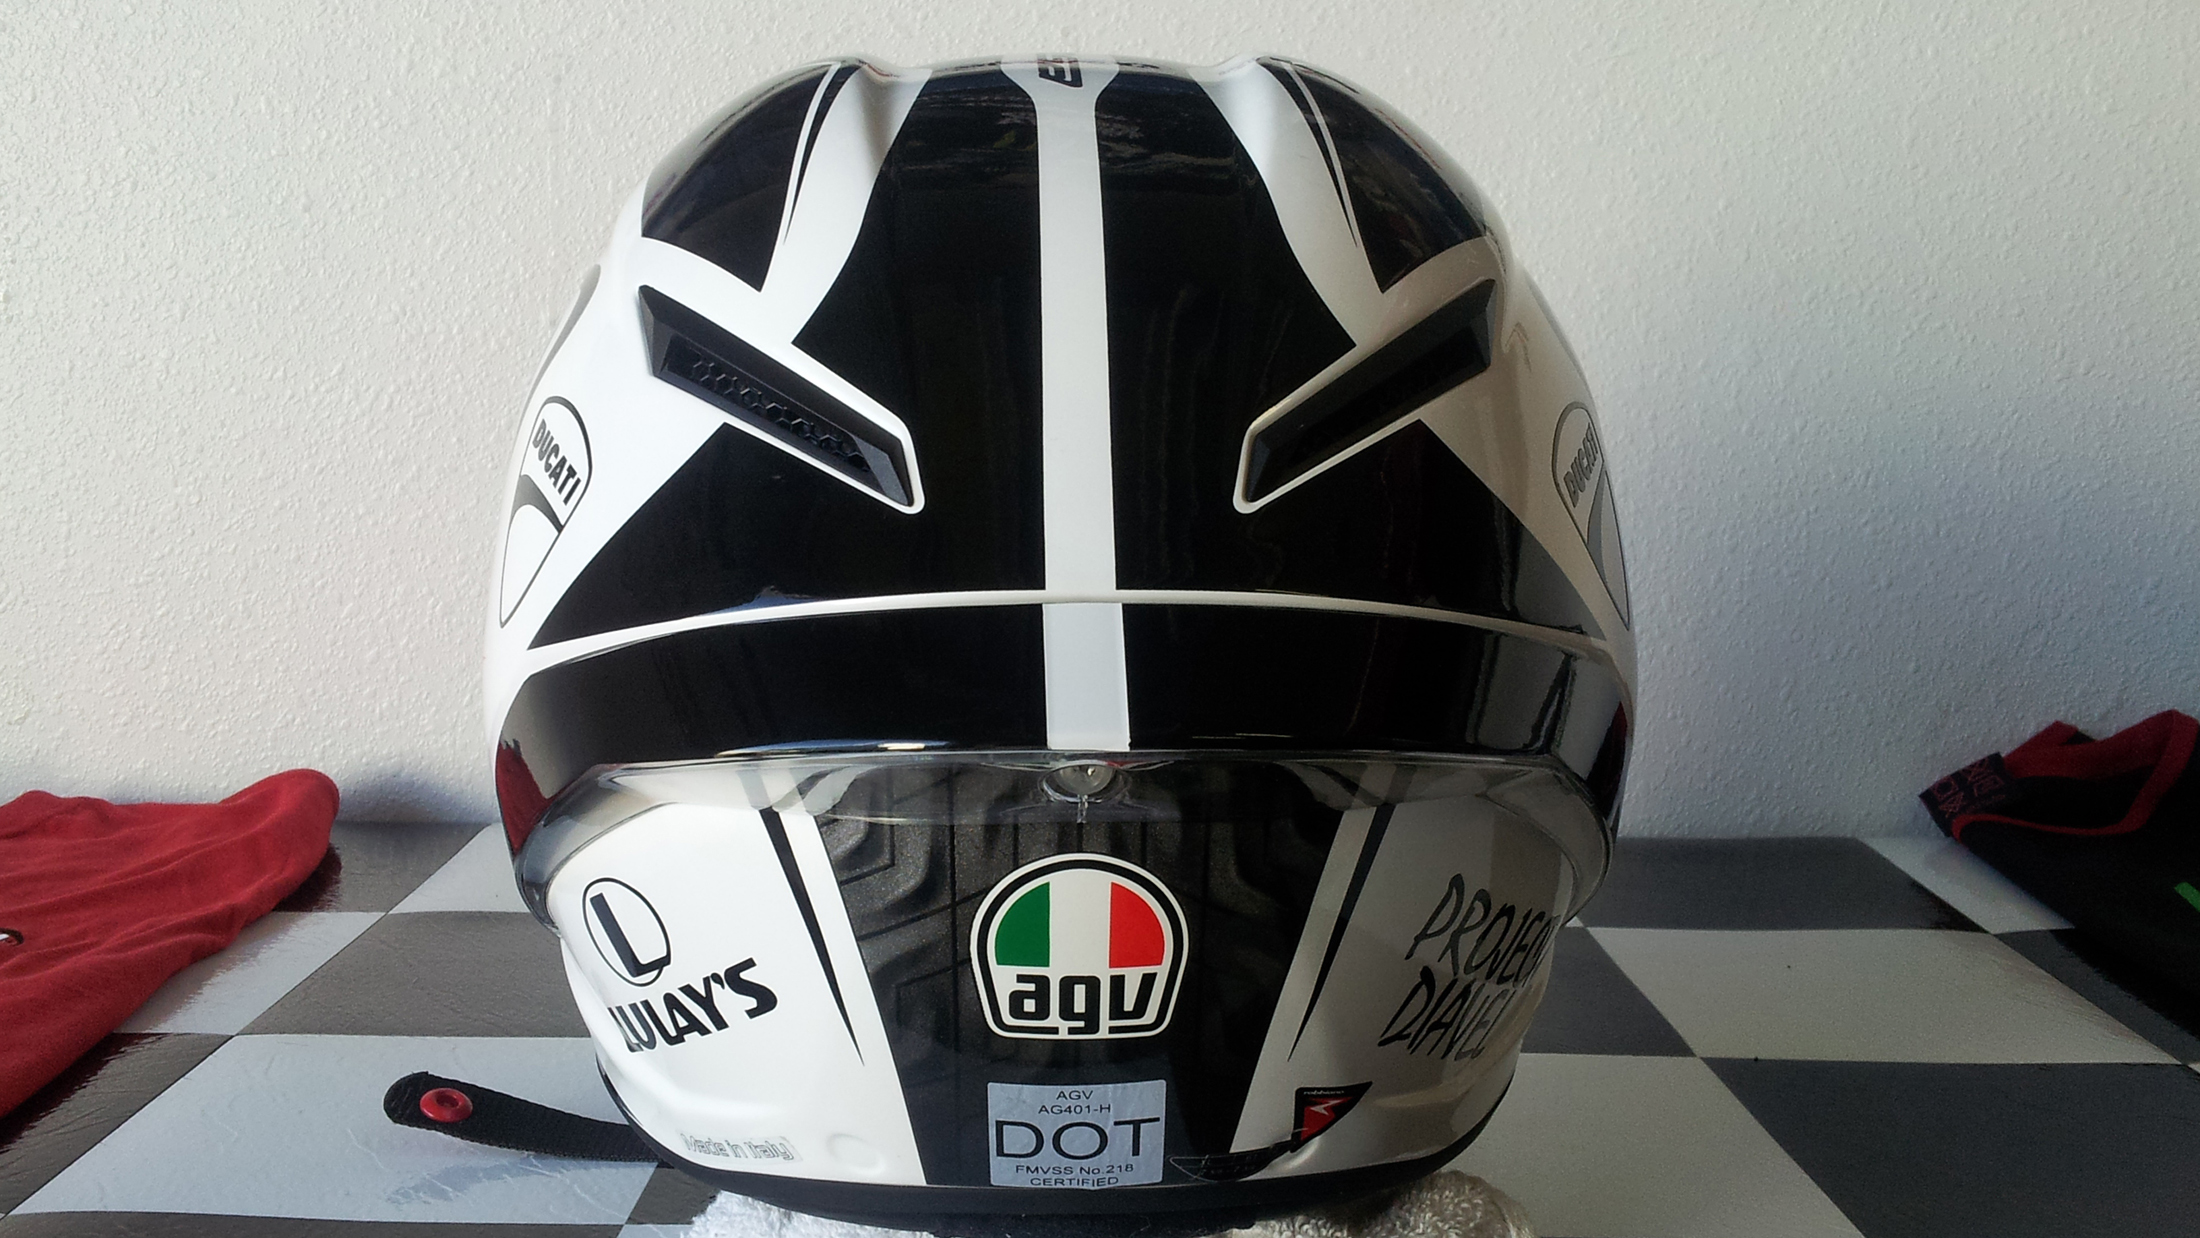
The looks of the bike and other gear I will wear on the bike, help dictate the direction I take. A blingy bike may dictate a blingy helmet, a murdered out bike definitely dictates a solid black helmet, and on my sportier bikes I tend to go with a more graphics heavy theme. In this case, I knew I wanted to "brand" my helmet with a few decals - Ducati, Project Diavel, and my Lulay's logo. That meant that I wanted to find a scheme that offered enough blank space that I could fill those areas with my decals. Next, the colors in the graphics need to be what I like. The bike is black and red, so I knew I would want black and red in those themes... but I decided that I wanted to add as much white into my apparel as possible to help "be seen" better when on the road. I started by doing an image search on Google with various combinations, when I spotted the AGV Corsa Circuit. I instantly fell for this theme.
When it comes to helmets, "I like big wings and I cannot lie"... well, I like big wings and big scoops and this helmet has both. I didn't like the looks of the clear wing, but I knew I could take care of that.
Weight
I found several helmets that offered carbon fiber, and tri-compound. So I determined that the helmet must either be all or part carbon fiber.
Ventilation
The ventilation in this new Corsa helmet is greatly improved. The scoops are bigger and enable more air in and out. When you remove the liner, you can clearly see that the intake areas are big. It has three seperate intakes at the top, and a nice vent low (that has a hidden switch).
Protection
I let the governing bodies determine that. If it gets a good rating (DOT, SNELL, and such) - then that's good enough for me.
Noise
If my bike is a quiet touring BMW or Honda, then I want the quietest helmet I can find. My exhaust is loud and I'm going to hear it, and if I want to hear it less I will wear ear plugs. I also want ventilation to win out over noise - because I can correct noise with ear plugs, but I'm not going to create better ventilation by drilling holes in my nice new helmet.
Lineage
If it's good enough for Valentino Rossi, it should be good enough for me. Ok, his is a full carbon fiber Pista - but it is the same style/shape, venting, model, and brand.
Fit
I used the sizing chart and my dome was 1/2 inch less than the Large, so I ordered the large (which is what I wear in my Bell Carbon Race helmet). It was just too tight, so I had to send it back and wait for an XL. The XL is still tight on my dome, so I pulled the liner and made sure the adjustment was where it needed to be. The cheek pads are too thick, but I know that they will loosen as I wear it.
Price
I wish I could say the price was never an issue, but most of us have to live with in a budget. In this case I set my budget then compared all of the things above to other helmets before making my final decision.
- I wasn't planning on getting a different windscreen for my bike. I bought a Ducati Roadster the first week I had it, because I liked the way it looked and knew even a small shield added wind protection... but then I saw the Puig Sport Windscreen. What drew me to it was its ability to adjust from sport to more of a touring position.
I made sure to take photos of the before and after of the Puig to Ducati, and the position difference (up and down) - you can see those in the photo album and video. The Ducati Roadster mounts lower and closer to the cowl (which looks a little better), but Puig makes quality looking stuff and their screen style looks nice - and with a slightly narrowed top and bottom it looks a little sleeker.
I'm sure that Puig says that you should NOT adjust the screen while riding (for liability reasons) and I agree, but that didn't stop me from doing it and I found it very easy to do. Switching from low to high mode on the fly helped me know the difference, and there is definitely a difference. If any of you have ridden bikes with power (or non-power) adjustable screens, you know that as soon as you get into a higher speed zone you reach over to adjust... because it is more comfortable. You will do the same with this windscreen, because it is worth the quick twist and lift. I am confident I will raise it everytime I ride.
For anybody trying to decide between a low sport shield and a full on dorky touring shield, I would recommend this great option. And the price ain't too shabby either.
Installation
The installation is really straight forward and will take less than 15 minutes (that includes being careful). You remove the four bolts holding the handlebars, put in spacers, then place the bolts through the Puig's cage. The instructions said you have to mount the shield to the cage, but my shield was already mounted (although the bolts needed to be tightened). Make sure you re-adjust your handlebars to the angle you like best.
- I've been looking for a solution that I liked to solve a problem I had with the limited storage of the Ducati Diavel's tailbag setup. I like the Ducati seat mounted tailbag because it is solid, but the bag doesn't expand like so many of the other tailbags on the market. My Sargent seat doesn't come with attachment loops like a stock seat has, which adds to my dilemma. I finally played around with my Tourmaster tailbag and noticed that I could strap it down on top of the Ducati tailbag using the over strap that comes with the Ducati bag, and I can attach the cords to the same mount points. It mounts solid and gives me enough space that I don't have to try to add a tank bag, or wear a back pack. Opinions will vary, but initial testing looks good. The August Epico Californiano ride will let me know how it does.
- One of the short comings of the Diavel's cool design, is many touring options are made difficult - here a couple examples: 1) Tank Bag Mounting - because of the cool LCD display containing your modes, gear indicator, and more - when putting a tank bag on (and put stuff in it to expand) you can not see the display; 2) Rear Tail Tie Down Options - the tail area is very clean and looks great, but you won't find solid locations to strap down your tail bag (it has straps that you can expose from under the seat, but no solid frame type areas to attach tail/side bag straps to).
So if you are going somewhere and want storage, your quick options are Body Mounts (like back pack, fanny pack). If going on an overnight ride - my tailbag setup is too tall to use with a back pack and a fanny pack forces you to incur unsavory comments from your peers ("you look like a girly man"). I started searching and found 2 Wheel Ride's Holster Bag. It offers enough space to put various things you need to carry (cell phone, wallet, keys, and a big pouch for a gun, camera, or other stuff) you might want to keep on you.
One strap goes around your waist and a lower strap goes around your leg - allowing the bag to strap to your leg instead of your waist (again, fanny packs are fine if you are also wanting to add a bit of femininity to your look). The straps are wider which gives me the feeling that it will handle more with less effort. The quality looks good and much better than the other leg side bag that I bought specifically branded for motorcycles.
The first thing I need to state about this category is - it is subjective... which is a fancy way of saying "I like what I like" and it may not be what you like. I evaluated the bike's colors, finish materials, and shapes. I tried to follow some of the bike's primary OEM themes - carbon fiber, contrast cut (polished and black - like the wheels), and the Ducati red color. One of my decision points was the optional colors of the billet parts. I could have gone with red for all of them, or a mix of red and black parts, but in the end I decided to match the contrast cut black look found in the wheels. I wanted the use of red in optional parts to be very purposeful and to accentuate the red that came from the factory. I have been a racing fan since I was a little boy, and perhaps that is why I am enamored with wide tires, loud engines, racing stripes, and decals. My enthusiasm with racing often influences my choices, and that is evidenced in the decals.
- You basically have three locations to choose from - 1) the stock location, 2) a side mount to the left side of the axle, 3) between the rear signals. To me the obvious choice seemed to be to put if between the signals from the beginning. The factory certainly could have figured out a super trick way to do this and it would have been great.
So what they didn't do, Competition Werkes did do. Their setup has a pivot hinge at the bottom that is spring loaded to keep it always moving towards the mount position - and a lock slider to secure it in the mount position. The kit comes with an led light (decide between black or stainless).
Installation
It took me about two hours - their site says an hour, but not if you have to check/double check your plan, get your tools and find out who didn't put all your drill bits back in the drill box, bounce a tool off the garage door - tool box - floor - then find that same tool on the floor against the wall behind something heavy, and then just getting it done. This isn't a simple, un-bolt/bolt operation... but sometimes it takes more effort to be a little more different than others. You will have to drill holes in your handle, and I was reluctant to drill on my new toy... but it is in a location that doesn't reveal it and if you ever changed your mind you could put that reflector back on. I suggest watching my install video completely to get the idea of what it took to do it.
Tools needed
6mm allen socket (don't try this without it); wire cutter, wire stripper, two 10mm wrenches.
- Billet parts help add finishing touches to your bike. They're not likely to be obvious from a distance, but when folks start bending over and looking closely at your bike - parts like these show your attention to detail. I decided to match my billet parts up to a couple of the primary materials found on the OEM Diavel Carbon... so I stuck with the carbon fiber and contrast cut themes.
Trinket Day referred to me identifying the parts in the pile that I knew would be easy to replace, so I gathered those parts up and installed them all at the same time. The parts included the water pump cover, timing inspection cover, rear shock adjuster, rear brake reservoir cap, radiator cap, and an oil filler plug.
I ordered these parts directly from DUCABIKE and was surprised to see that they got from Italy to my door in less than one week. As usual, I quickly opened the box like a Christmas present and thought I heard an angelic choir do the "Awwwwwwwwwwe" noise along with a golden glow that came from the box... ok maybe not, but I reacted as though that really happened.
Installation
A couple of the items were caps, so they were a direct replacement (just remove the old and screen on the new). The brake reservoir cap stuck inside the cap cover (comes with the allen tool needed to attach it to the OEM). The shock adjuster was straight foward - just remove the allen screen and replace the knob with the new one. The alternator cover required the removal of two allen bolts and a paper towel in case there is any oil leakage. The water pump cover used a dab of grease when I re-installed those bolts.
Tools needed
Shock Adjuster 3mm allen; Alternator cover 4mm allen; Water Pump cover 5mm allen
Disclaimer: Ducati owns their logo and I am not reselling any of their logo stuff. I simply created some things that I wanted for my bike that I couldn't find on the market. If I decided to sell any decals, it would be with my custom logo design.
Wheels
I searched all over the web to see what was available for wheel accents. I couldn't find any and I thought... I am a graphic artist and know a good decal guy, so I started working on designs. I came up with a triple red stripe pattern with chrome letters. I lined the patterns up in the middle of the wheel openings so the pattern goes from one side to the other. It looks good sitting and nasty when in motion.
Tank
I like racing stripes, so there was no hesitation for me to come up with something more "racey". One of the things I noticed about the Diavel is no significant display of the Ducati logo, so I incorporated a Ducati logo cutout in the tank stripe. I had it professionally installed and after watching him, I'm glad I did. Because of the width of the decal, it kept wanting to curl as it went over the combination of curves on the tank... which required the installer to have a lot of patience and a very light touch with a low temp heat gun. The install took over an hour.
Rear Cowl
In addition to carrying the tank stripe through the rear cowl, I decided to put "1198" decals in chrome on the rear cowl. I played with position and style for a long time in Photoshop to get what I liked best for the bike. I chose chrome decals to match the chrome in the wheels.
Installation
There are lots of competing curves which make applying decals on some areas of the Diavel extremely difficult. Even a pro-installer may make a mistake, so I would make sure you have backup decals in case something bad happens.
- I have too many GoPro mount options to count... but as much as I tried, I haven't been able to come up with anything that mounts to the bike in the location I want without getting major vibration. So I started searching the Internet trying to find something that could do a long enough extension that looked solid... enter Ram Mounts. They have tons of combinations, and the ones I was most interested in were based on clamp mechanisms that tightened onto a mounted ball. The idea is to mount a ball at the bottom of the GoPro, and a ball at the bike's mounting location - then use any of their size combinations to locate it wherever you need it. I bought three of their clamp sizes, and two ball combinations (one with 8mm and one with 10mm) - thinking one of the ball mounts would mount to either my clutch bracket or one of the bolts around the gas cap. As it turned out the diameter was much larger and the bolts of the balls didn't fit. Fortunately, the 8mm one had a bolt that goes through it... so I went to Ace Hardware and found a bolt that fit my clutch bracket.
I went for a test ride and there were a few things I was trying to do with my major view: I want to be able to see a part of the speedo, part of the road un-obstructed, part behind the fairing (as much of the camera behind it as possible), seeing the gear indicator would be a plus, and not invading the area gas cap area (opening the cap without having to move the mount) was mandatory. Other than seeing the gear indicator, everything else was accomplished.
Each of the Ram Mounts products appear to be very high quality and solid (I love stuff built solid). The mounts stay tight and you can't compare these mounts to the GoPro mounts - a huge improvement. The only thing I want to continue work on is tweaking the current location options to see if I can get a view I like even better.
Installation
Neither of the two options I thought would bolt up to the Diavel did, but as I said - I was able to get a bolt from Ace Hardware that worked. The two options have since found would be a better mount solution - one is a motorcycle handlebar claw and the other is a motorcycle clamp that replaces the current clutch clamp and has one and two ball options. In addition I plan to get a couple of double balls that will enable me to join another clamp to give me better position options. I'm very impressed with the Ram Mounts products.
 - I've never met a stock motorcycle or car that I didn't think would benefit from an exhaust modification. Normally, I've got two things in mind with an exhaust - how it looks and how it sounds. However in this case I have a third consideration - the Diavel has a single sided swing arm which exposes the beauty of the wheel... and why would anybody want to hide that beauty behind an exhaust? So began my quest for a can to meet my three considerations. I opened Google and typed "Diavel Exhaust", then clicked Images (I like to start with the visual to get ideas, then I click the "visit" links by the photo to find out things like the brand).


 - When I bought the Diavel one of the first things I searched for was factory cruise control, which I found quickly was not offered. The closest thing I found to factory cruise was buying a tuner that controlled the air/fuel mixture and connected to the bike's electronics. Even though I found one, the tuner I wanted to use (RapidBike) didn't offer cruise at this time, so I started looking at various throttle lock options. I found the Go Cruise and liked that it was an easy install and looked very simple to use.