

Review of Sargent's World Sport Performance Seat for Project Diavel
Ordering the Seat
The Project Diavel seat was among the list of pre-order seats in Sargent's debut of their World Sport Performance Seat for the Diavel motorcycle. Ever since the Diavel was introduced, motorcycle enthusiasts and Sargent fans have been asking/hoping/praying that Sargent would decide to offer a seat for the Ducati Diavel. Sargent said the seat has been in the plans for a long time, and as with other seats - they wanted to get "real world" testing on the bike to make sure they could offer a product at their high standards. I'm sure other things contributed to this delay as well, but whatever their reasons - in April of 2015 Sargent finally announced that the seat was ready for distribution, and they began filling orders.Pre-order seats were the first to be shipped and were sent that first week of April. That same week, I was on the phone with their representative to go over my custom order. When I saw their World Sport Performance Seat's design with the carbon look, I knew I was going to have to make a tough choice. The carbon look would match the carbon theme of my bike, but judging Sargent seats that I had seen in the past, their leather was too nice to pass up. So I stuck to my original thought and went with leather.
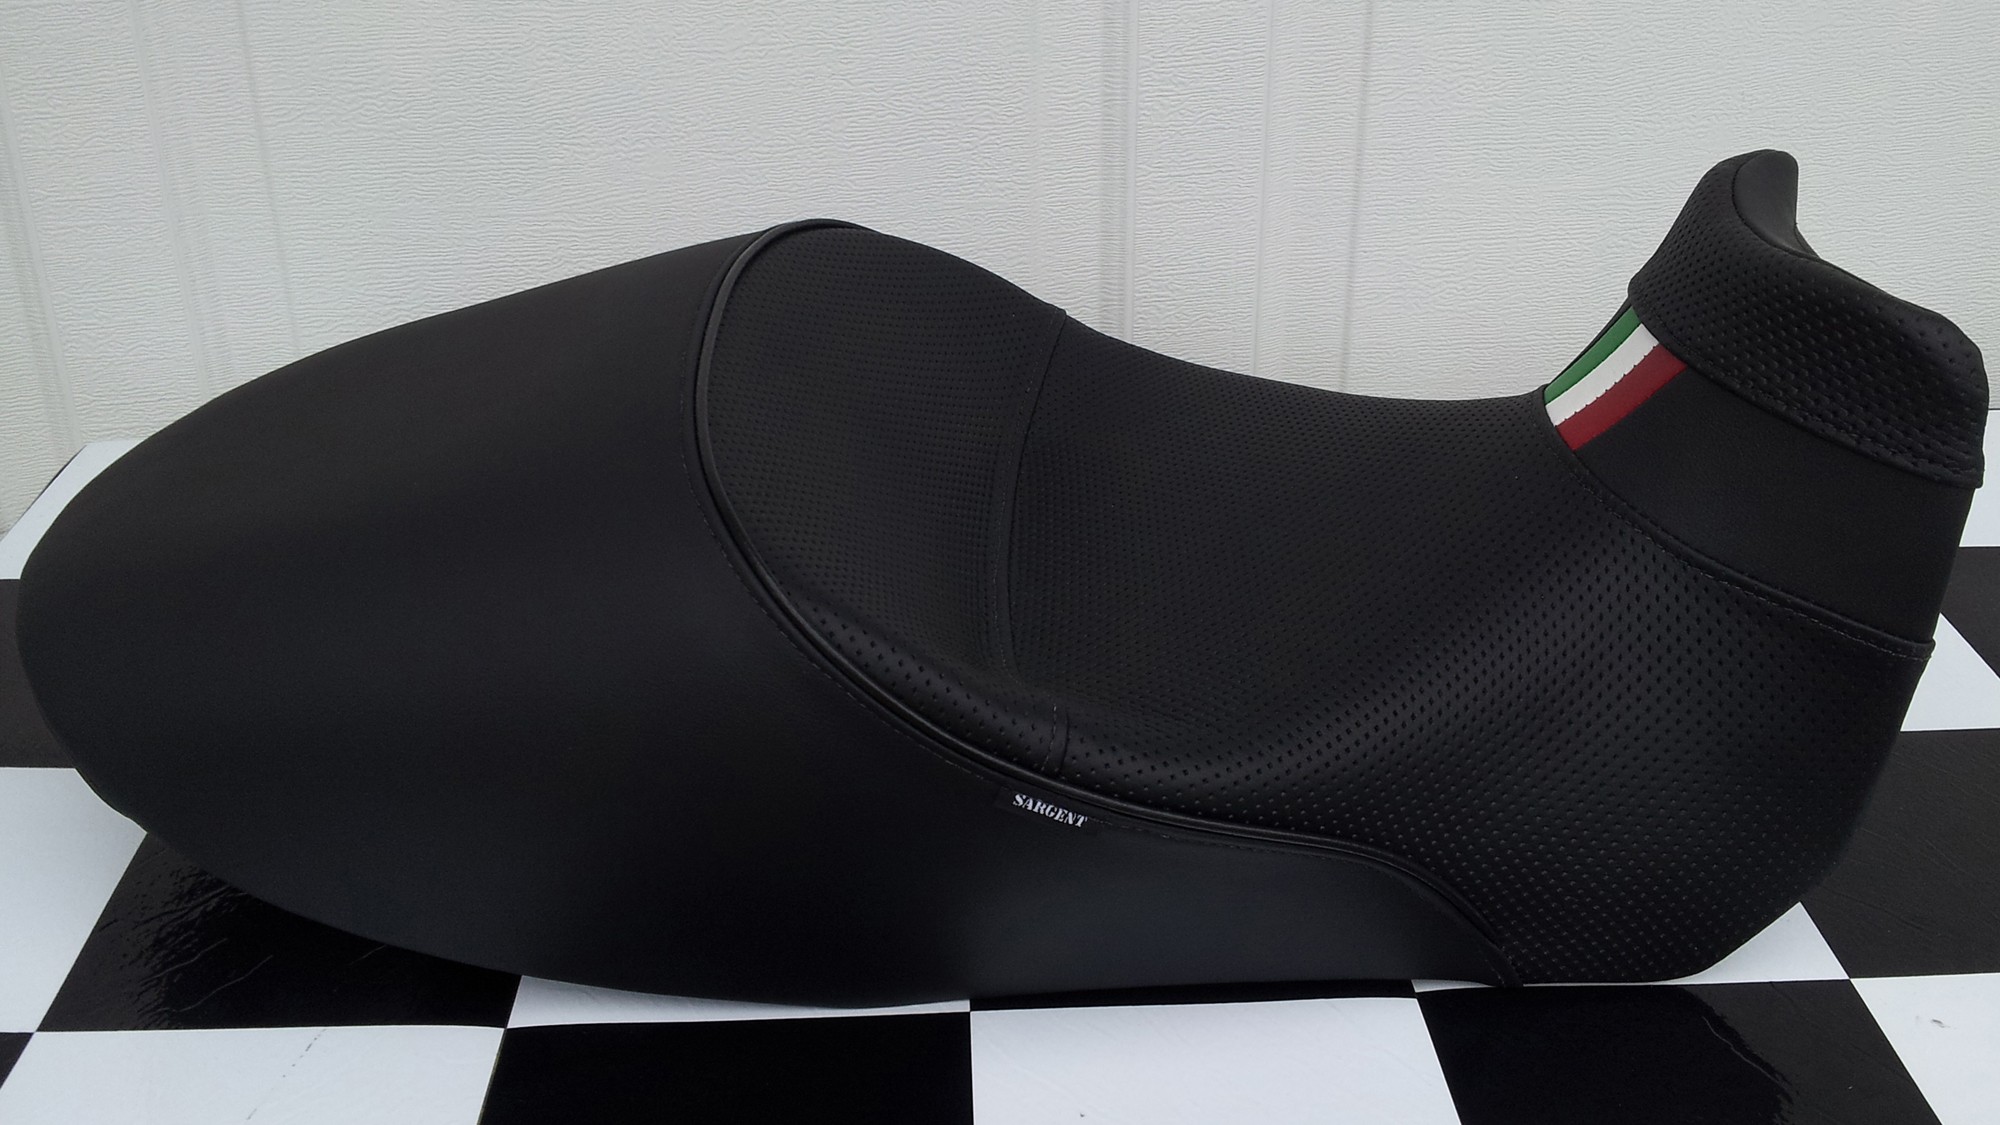
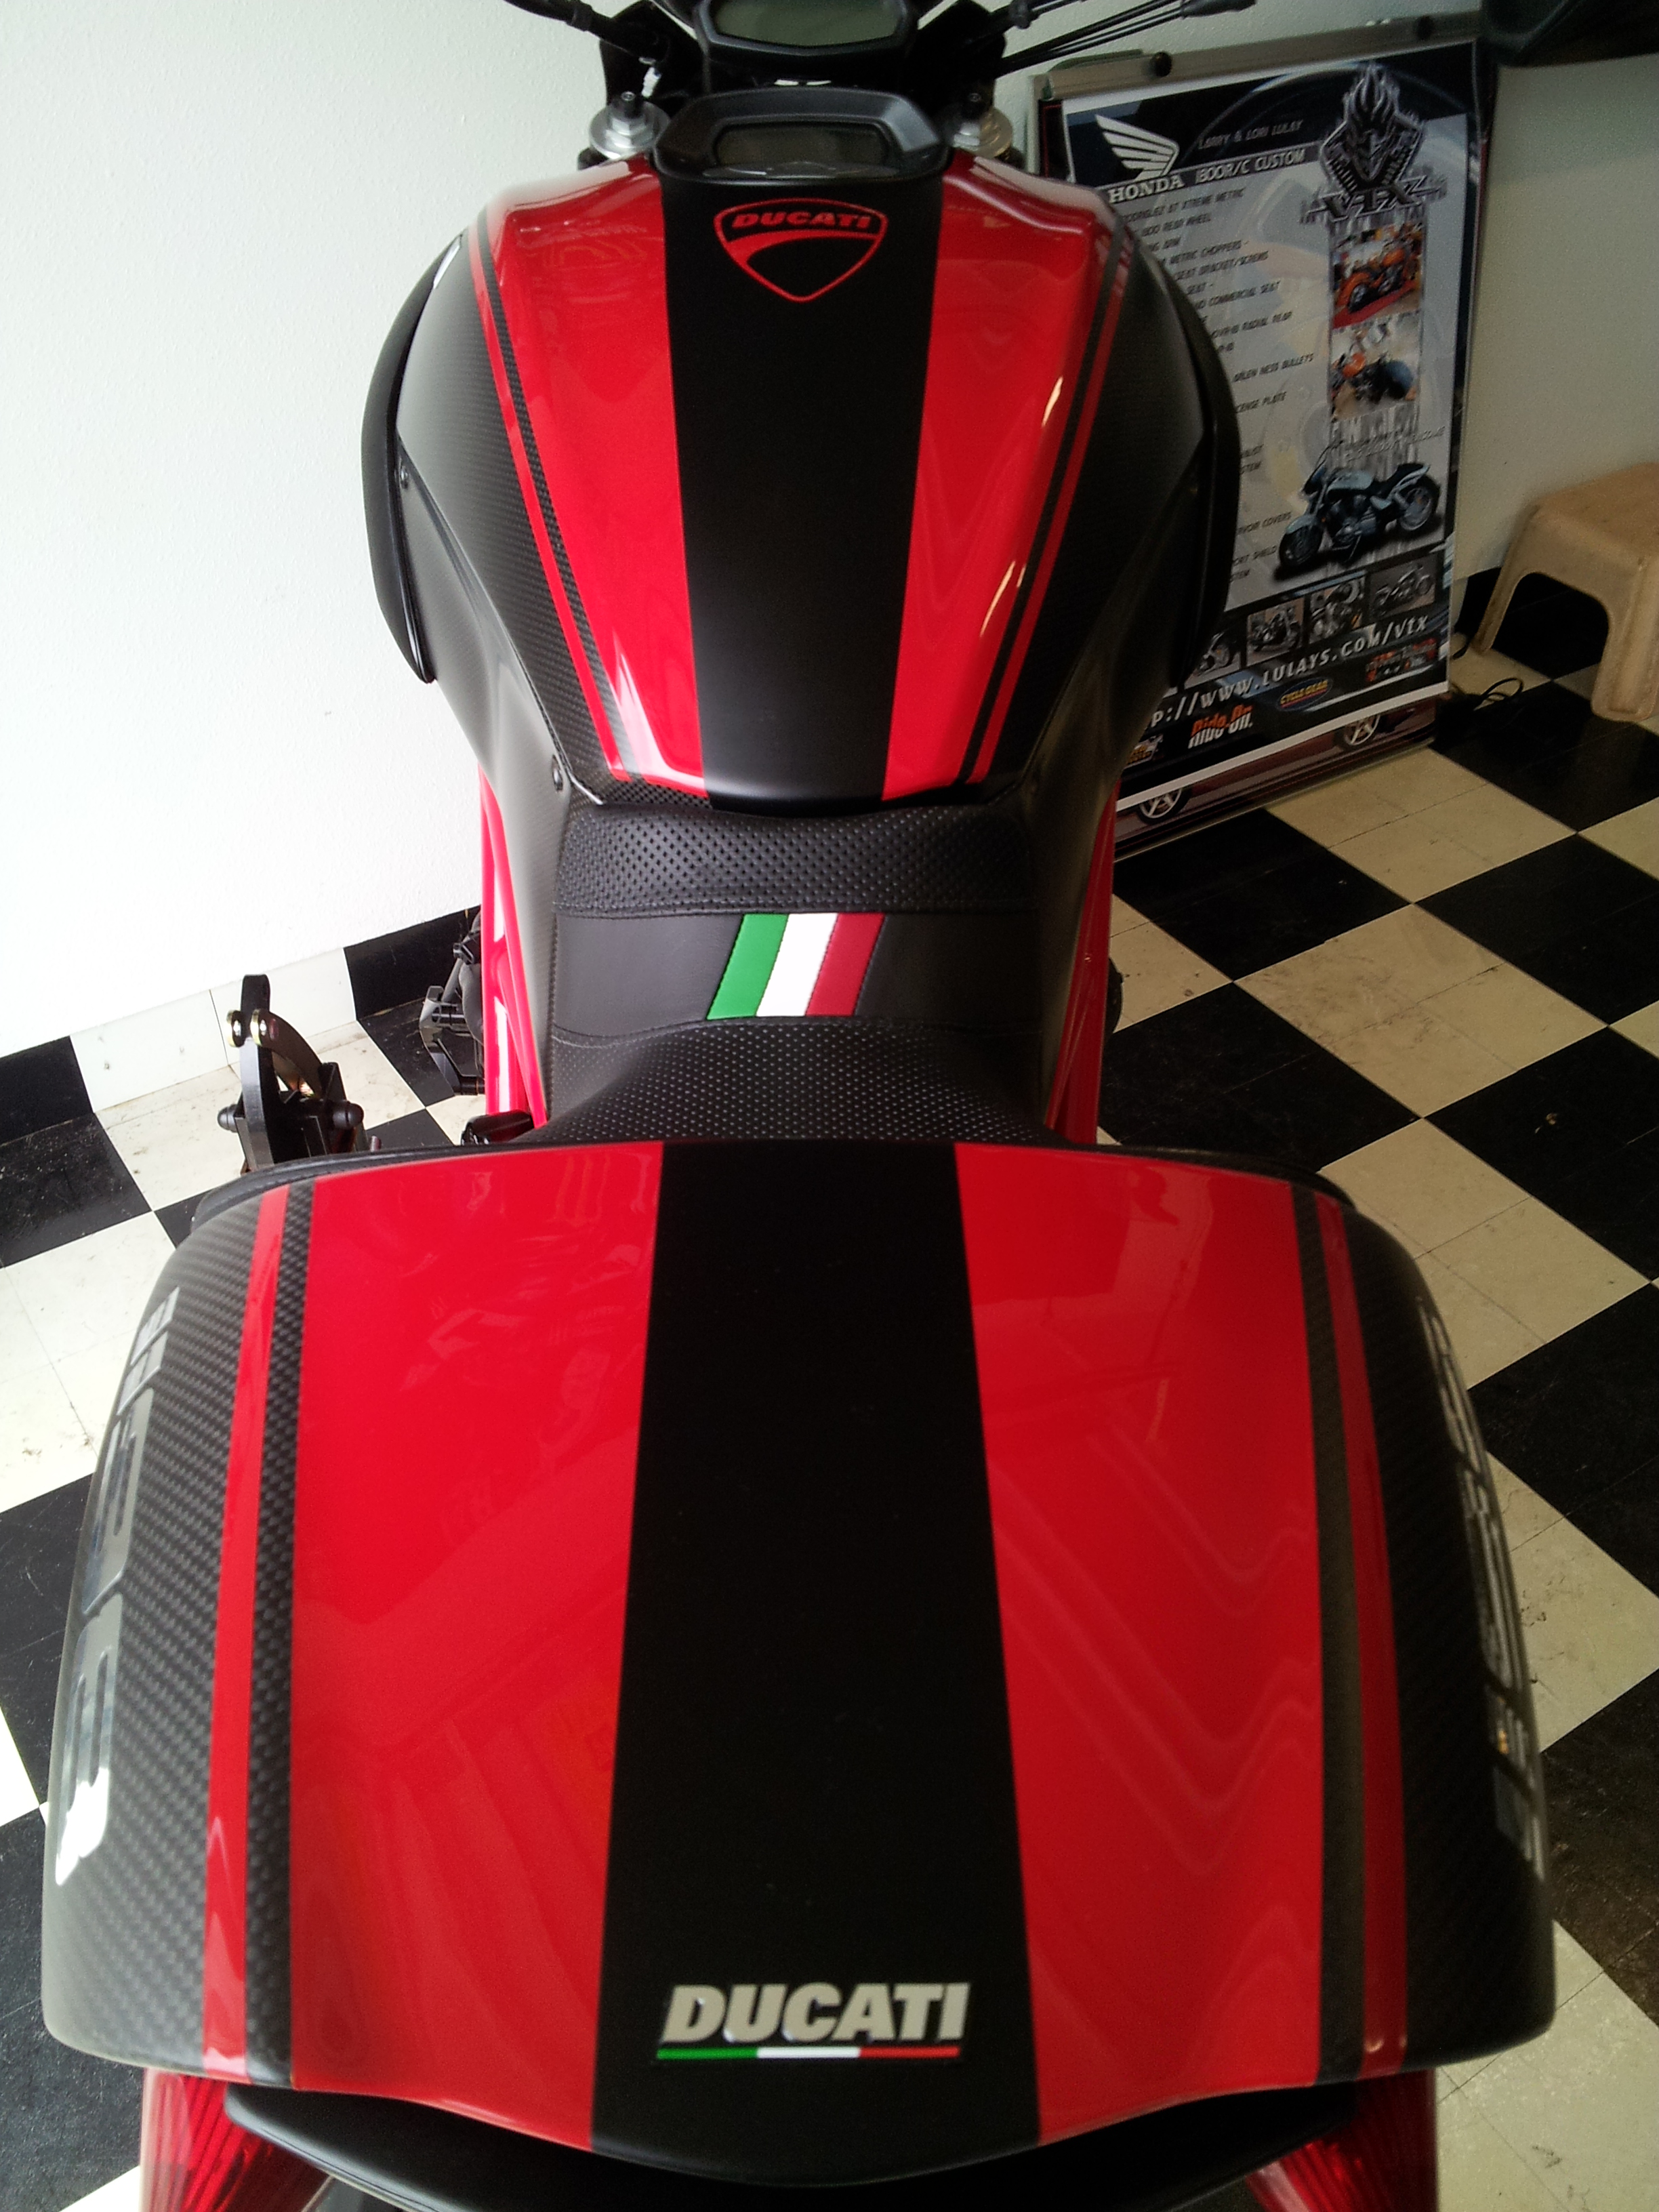
I knew I wanted leather, but until looking at their offerings I had no idea that perforated leather was an option. The idea of perforated leather hadn't crossed my mind, but I love "that look" on my jackets - so I assumed it would look great on my seat. I liked how they went with a different pattern (carbon look on front, smooth on back), so I ordered the perforated for the front part and smooth leather for the back.
 I also decided to do something I hadn't considered before - heated seats. I have them in all of my cars and use them nearly every morning. I compared my experience with heated seats in my cars to knowing that I liked heated grips, and concluded that this option should be just as satisfying. I ordered heat for the driver and the passenger. If I didn't get heat in the rear, I can imagine the whining discussion that would have commenced... "you always think about yourself first, never me", "you always get everything you want, what about me? - I cook your meals and wash your clothes and..." - actually, that's not it at all. At the ripe old age of 52, I've learned that if you do something nice in advance, it makes it easier on me later when I drop a lot of cash on the next cool thing ("remember when I ordered that heated seat for you?") - you young fellers can still learn a lot from us old guys. Ok, I think you get the point - I ordered heat for the front and rear.
After discussions with others, a good question arose a few times - what do they do about rain protection for the perforated leather? I hadn't really thought about it, so I asked them. As it would turn out later, that question prompted a bit of a delay in my order.
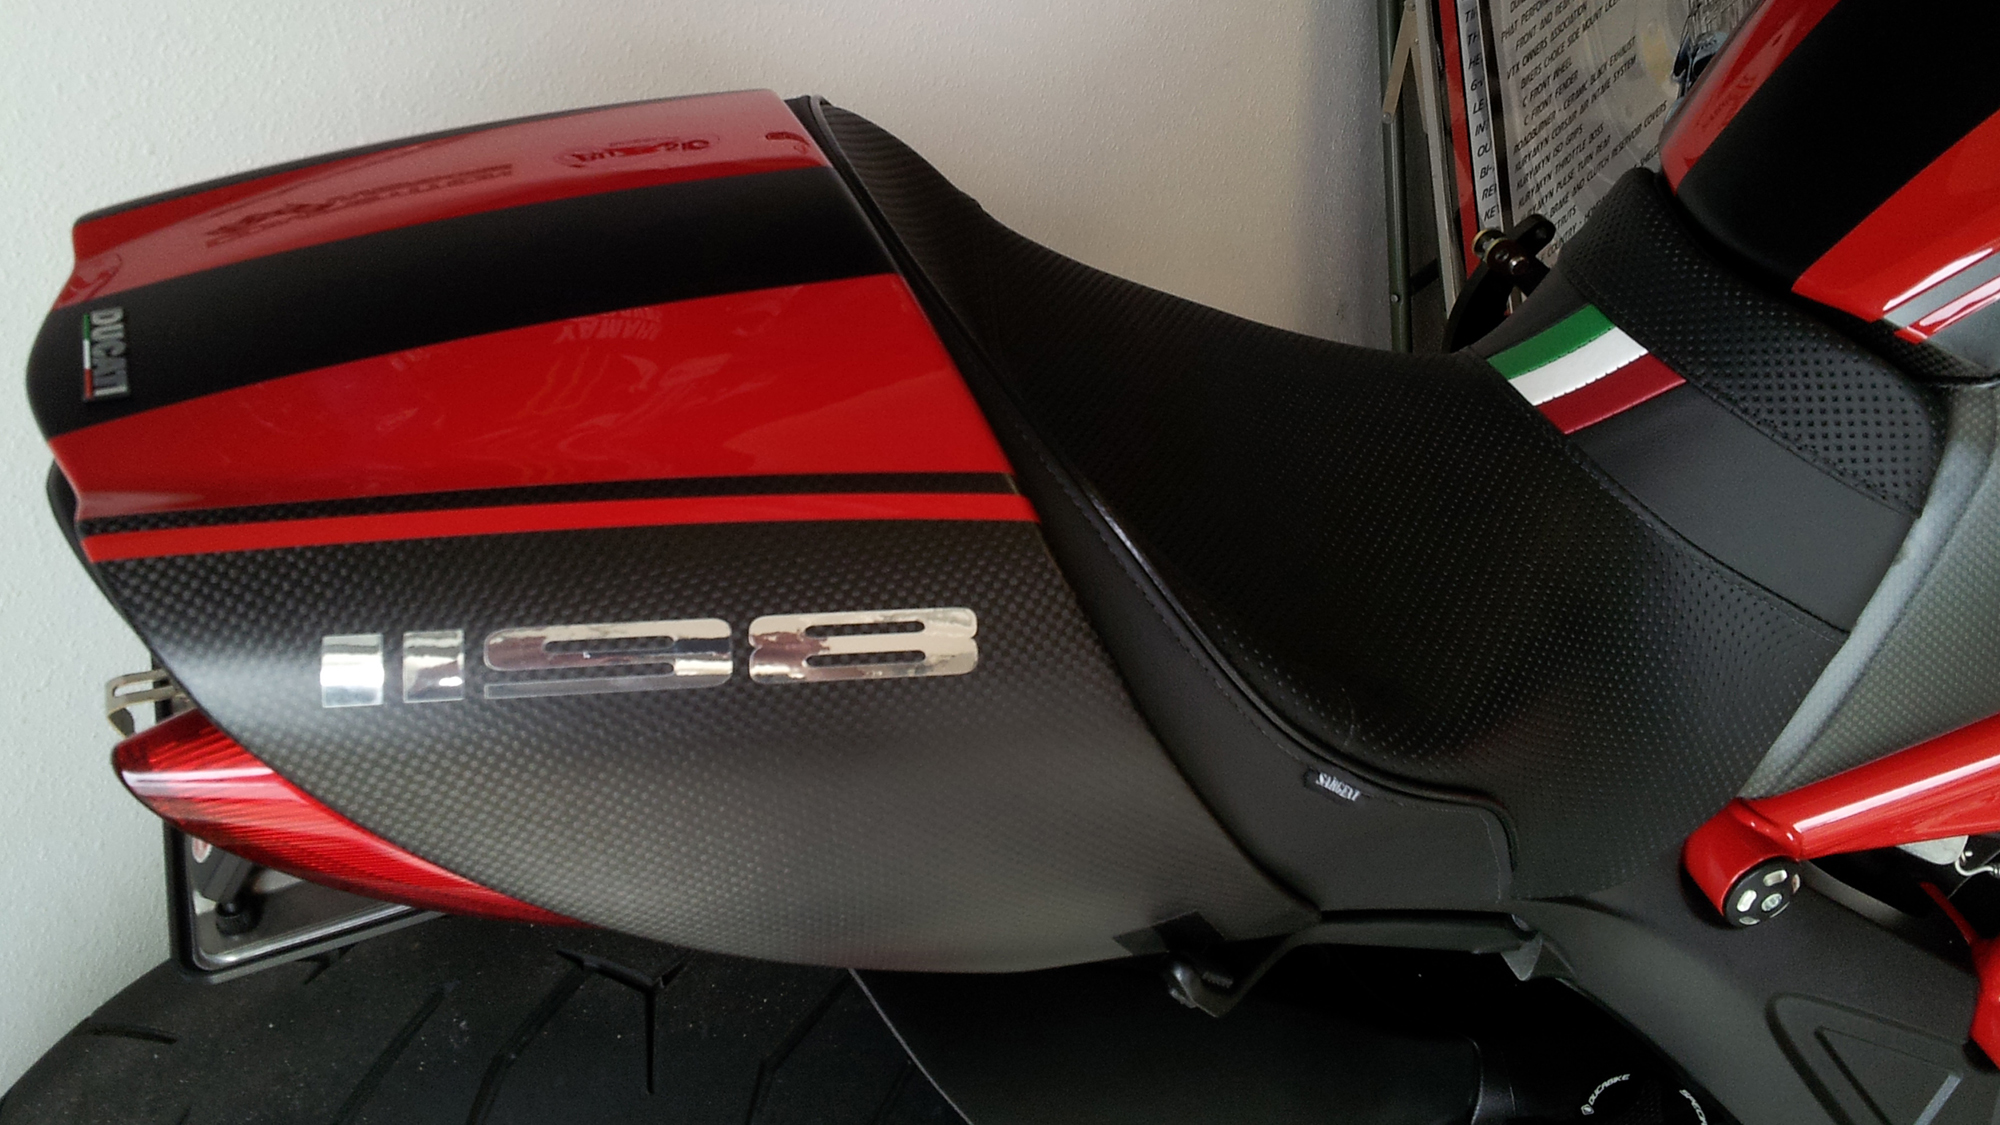
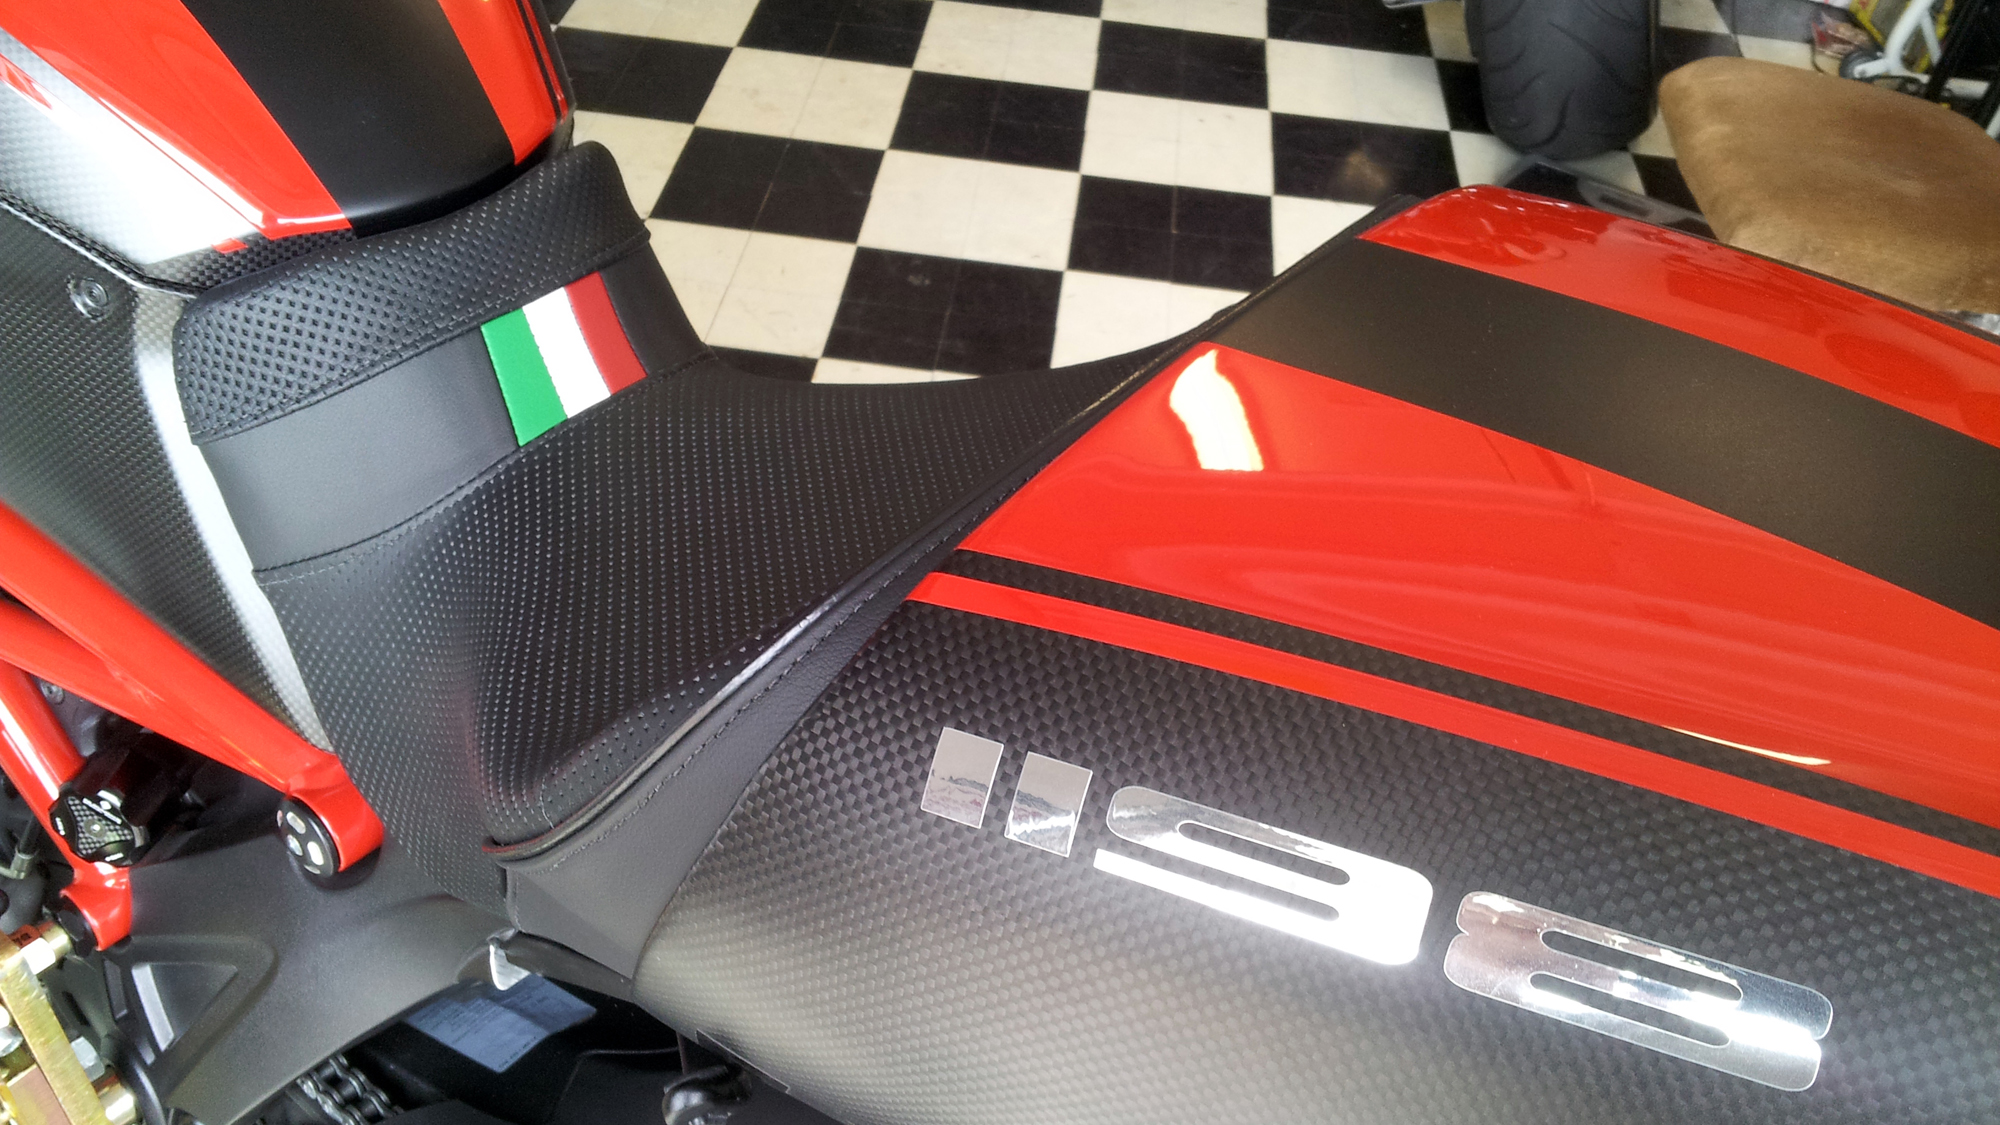 The final touch to make it different than others was to order their Tri-Color option. Not that I'm interested in adding a bunch of colors to my seat, but this is my first Ducati and I am part Italian - so I went for that too. Hoping it doesn't look too "dorky".
So a week went by, and then another. Each week, I checked in and their rep told me they were still testing. He would always add a little tidbit - "it's going to look so cool", "it will be the 1st one", all the kinds of things that add to the anticipation. As it turns out, they were working on a new moisture barrier that would go behind the perforated leather and prevent rain from soaking in. My seat was the proving ground for what I later found out would be an all new process and offering from Sargent (for all of their seats with perforated leather)... so we got to be a part of Sargent history (they may opt to send all bonus checks to Larry, in care of "Larry's Fun Fund", not be confused with "Larry's - How Could I be so Stupid Fund").
Inital Look and Comparison
Ordering all leather raises the bar and expectations, and the leather quality didn't disappoint. I was really intrigued at the thought of doing perforated leather, because until now I had only seen it on jackets and suits. I can safely say that I am a fan of the look, and thankfully I think it goes well with the carbon theme (Sargent's default Diavel seat comes with a Carbon Fiber look - which matches carbon bikes very nicely).I put them each on the scale and the OEM seat weighed in at a smoking light 5lbs, but equally surprising was seeing this Sargent leather version with the heat goodies only weighing in at 7lbs! One of the big reasons for this light weight is their seat pan which is molded in a very professional looking and high quality composite. Sargent added a nice touch by including an LED flashlight (which lets you know that they are a company that is very tuned in to riders - since they ride themselves). The seat pan also raised the bar with much improved rubber supports that appear to be nearly three times the stock supports - which I am hoping helps equate to even more comfort.
Once mounted I find the seat to have a flatter and more spacious feel in the butt area - more comparable to a Gen 2 stock seat (which in my opinion was a nice improvement over the Gen 1 seat). Since one of the things that drew me to the Diavel was the nice low seat height, I didn't want to mess that up - so I ordered Sargent's stock height version. I feared that they might raise it some, but to my surprise - if anything it feels slightly lower - and that may be because of the flatter / more open feel.
My history with after market seats is they generally don't quite mount as nice as the OEM seats, but this is another thing that Sargent got right. You slide there metal tabs (versus the OEM plastic) under the tab holders and easily click in the back - like the OEM seat. The only little "gotcha" here, is that you have to remove the rubber tabs to mount the Sargent and in the event that you want to switch out your seat for another one, you will get slowed down looking for and putting those rubber snubbers back in first.
The only thing I found missing (and in my mind important) are the four straps found on the OEM seat, which offer the only mounting points to be found on the Diavel's tail. Those of us riding these bikes notice that they have really clean looks around the tail (and with their clever rear peg design), but that comes at a cost of having no easy mount points for things like bags, helmets, and other strapable options. So, I am pondering what I might be able to do to accomodate that - I guess you need to stay tuned to see if/when I figure something out.
I didn't get a long enough ride in to get a good opinion (either pro or con) yet, but that will change soon and I will update this part of my review when I get some seat time.
You can get more visuals by either clicking the images to the right (to see full size images), or using the First Look video link below.
Installation
It's a seat, what is there to install? Ah, lest you forget we ordered dual heated seats. They are in the seat... but we need to get power to them.My quick advice is to just have a dealer install it. If you live close to a dealer (I don't), don't have the time, don't like the mechanical stuff, or don't feel confident to give it a try - these are all good reasons to leave this to the professionals. If you have never done anything electrical on your bike, I'm not sure I would want to start with this one. Start to finish time (depending on whether you drop/lose screws and such) is two to four hours. I know that is a wide gap, but much of that time will be spent staring at various areas of your bike planning various parts of attack. I did the install over a couple of evenings (if it would have been a weekend night, I would have pulled an all nighter).
To stay focused on each task, I would suggest the following overview plan:
- Determine Controller Location - determine where you want to mount your control(s) and then find videos that will show you what/how to disassemble to achieve your location;
- Determine Your Power Location - either you will tap into some existing power source, or you will route power directly from the battery (that is located in the chin spoiler, and the routing of that will take some signficant time - unless you just want to tape it to the outside of your frame);
- Determine Your Keyed Tap Location - a wire runs from the harness relay to be tapped into an existing source with an inline adapter (supplied by Sargent);
Controller Location
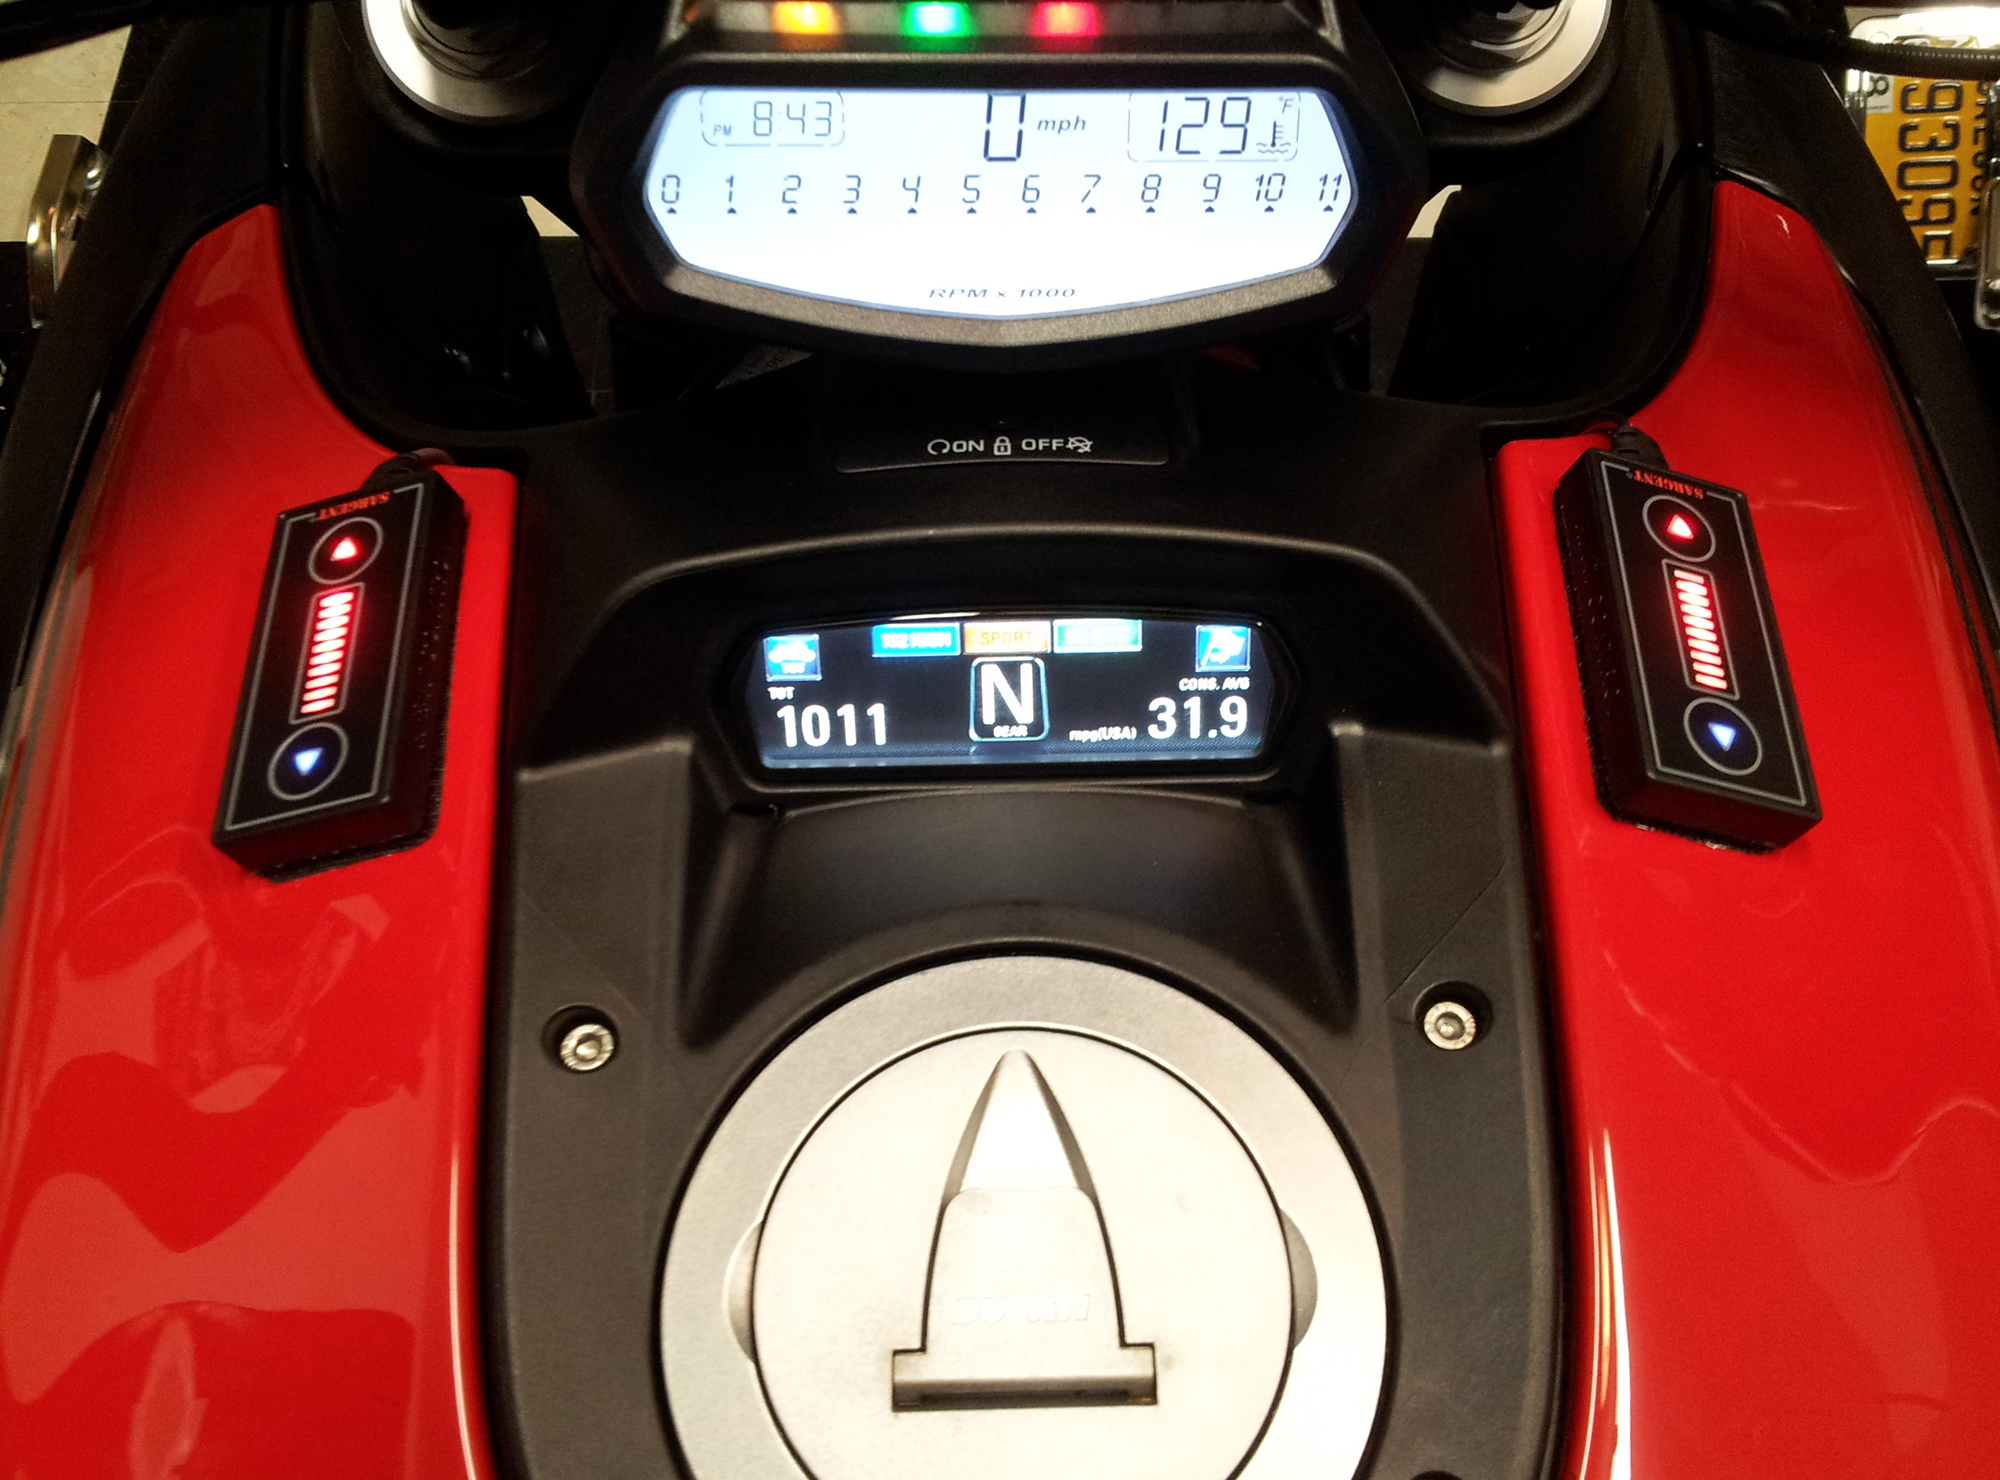 Each controller has a strong stick tape with velcro. Because I knew I wanted to mount mine forward (near other controls), I wasn't sure if the controller wires would be long enouth, but Sargent gives you enough length to mount and route it pretty much anywhere you would want, and still have enough left to plug into the seat. I looked online and couldn't see the official length anywhere (and I didn't think to measure it before mounting), but I would estimate the length to be at least 6ft.
Now that I chose a location (by my lower LCD screen), I had to scout for anything that might prevent me from wanting to mount there. I didn't want to make any drilling or dremelling body mods, so either of those would have caused me to look for another location. I looked under the tank cover (while still on) for clearance and even tried to see if I could just slide the controller wire up under, but although it looked like there would be room I determined the tank cover would have to come off. I found a video online that went over removal of the tank cover in part of it, so I used that as my guide. The hardest part of the tank cover removal was pulling the cable out of the back of the lower LCD (to remove the last two screws holding the cover on). Try as I might, I couldn't get the cable out... but I was able to get my 4mm allen under the panel and remove the screws - and the good news was that I didn't drop either screw into the engine area (or I would have been screwed).
With the tank cover removed, I simply mounted each controller and taped them to the under side with Gorilla tape (you can see this part in the video). I placed the cover on, then prayed that I wouldn't drop either of those screws when I had to reach under the LCD panel to try to screw them in - and that went off great... so I was past the hardest part of this mod so far.
Power Wire Location
To get that great low seat height, the Diavel battery couldn't be located under the seat (like most sport bikes) - but instead it was mounted in the chin spoiler. So if you want to have a direct battery route (like the Sargent directions indicate) you would need to route a wire from the battery to the seat location. From the factory the 2013 Diavel has a plug sitting under the seat, and one of the uses of that plug was to charge the battery. Of course rather than having a standard battery tender plug, Ducati has a special plug... but I just happened to have a converter plug (it came with my factory Ducati charger that plugs into that location) - which allowed me to end up with a battery tender end. So I got lucky and have power to the harness.Determine Your Keyed Tap Wire Location
The only wire in the harness that doesn't have a plug, is meant to tap inline to a keyswitched component. The Sargent directions say to tap into a line to your tail lights and I just happened to have an exposed license plate light (from when I converted my license plate from OEM to the Competition Werkes relocator), so I tapped into that line.Concluding Installation
At various points of the wiring install, I checked to make sure I had power - which helped assure that at least at some point I had things going in the right direction. In the end, the seat plugged in and everything worked correctly.How Do I Like It?
The weather isn't currently allowing me to try it out, so when I get out for a bit I will add to this review.Tools Needed
4mm allen, tie straps, flashlight, wire cutters, pliers, power tester (is nice to have), wire taps (you will have to look at your power options to determine which size to get) - additional tools as necessary depending on your controller mounting location.Note: the tools mentioned don't reflect those that are needed for the controller mounting position, which in this case involved the removal of the tank skin. You can search other videos to find one on tank skin removal (I used MotoErgoSum's video titled - Ducati Diavel How-To Installing A Duc.ee Module).
Project Diavel Order Specifics
- World Sport Performance Seat - $610
WS-645-NS-HFK: Regular Height, Front heat with one Sargent controller - Full Leather - $200
CSS-COV-LTHR-F/R: perforated leather front, smooth leather back - Rear Heat - $199
CSS-HEAT-FG: Rear heat with power connection relay assembly with Sargent Heat Controller - Italian Tricolor - $30
CSS-COV-TRIC-ITAL: Italian tricolor across the nose
Retail price at time of this project: $1039.
Project Diavel made History with Sargent
- Project Diavel seat is the 1st ever seat from Sargent with the new moisture barrier. All of Sargent's premium perforated leather seats will now contain this new option;
- Project Diavel seat is the 1st Diavel seat with perforated leather (as of 5/15/2015, the only one);
- Project Diavel seat is the 1st all leather Diavel seat using a new pull method (something to do with how they attach it to the foam);
- Project Diavel seat is the 1st Diavel seat with heat (as of 5/15/2015, the only one);
- Project Diavel seat is the 1st Diavel seat with heated front and rear (as of 5/15/2015, the only one);
- Project Diavel seat is the 1st Diavel seat with the Tri-Color option (as of 5/15/2015, the only one);

